hostbook
Open dashboard

Hostbook operating manual

Use Hostbook like the whole team depends on it.

This guide explains what each screen means, how to complete common service tasks, and how to recover when a warning, bad count, or confusing state appears.

Read

Understand what the screen is telling you.

Act

Follow the task walkthrough before changing service.

Verify

Check date, service, table, status, and sync.

How to read the dashboard

A good shift starts by reading the same four areas in the same order.

TodayDinner ServiceNew

Reservations

Taylor, Jamie
7:15 PM - 2ARRIVED
Morgan, Lee
7:15 PM - 2CONFIRMED
Dining Room
12Taylor
7:15 - 2
8Morgan
7:15 - 2
  1. 1. Header: Confirm venue, date, service, counts, search, alerts, and settings.
  2. 2. Reservation list: Find the guest and read their status before acting.
  3. 3. Floorplan: Confirm the physical table state before seating or moving.
  4. 4. Drawer: Open details when the quick view is not enough.

Most common tasks

What do you need to do right now?

Start hereUnderstand what Hostbook is forHostbook is the shared service book for reservations, tables, guests, walk-ins, messages, reports, and restaurant setup.

What this means in service

Treat Hostbook as the room's shared memory. If a guest arrives, moves tables, cancels, no-shows, or finishes, update Hostbook so the next host, manager, or device sees the same truth.

Most mistakes during service come from changing the wrong date, the wrong service period, or the wrong table. Before you take an action, slow down for one check: venue, date, service, guest, table, and status.

How to read this screen

  • The left sidebar moves between the main work areas. Service Dashboard is for the active shift. Reservation Book is for the time-grid view. Guests is the guest database. Reports is for service summaries. Application Settings and Admin Settings control restaurant setup and permissions.
  • The top header is the control strip for the current day. It shows the selected venue, date, service period, cover counts, pending reservations, search, New reservation, bulk message, alerts, and settings.
  • The reservation list tells you who needs attention. The floorplan tells you where people physically are. The drawer on the right gives the details before you make a change.

What the labels and numbers mean

Service date

The date Hostbook is currently showing. Creating, seating, cancelling, or reporting all depend on this date.

What to do: If something looks missing, check the date before recreating a reservation.

Service period

The active seating window, such as lunch or dinner. Reservation filters, timeline slots, and reports can be scoped to this period.

What to do: Switch service before changing tables or times for a booking that belongs to another period.

PIN approval

Some actions require manager or admin approval, such as settings changes, overrides, fee decisions, or protected admin tools.

What to do: Use your own PIN. Do not borrow another user's approval unless that manager is standing with you and making the decision.

Walkthroughs

Choose the right screen before you act

Start from the question you are trying to answer. If the guest is in front of you, the Service Dashboard is usually fastest. If you are planning the night, the Reservation Book gives a cleaner time view. If you are investigating totals, go to Reports.

  1. 1Use Service Dashboard for live service.This is the host-stand view. Use it when guests are arriving, tables are turning, or staff are asking what is happening right now.
  2. 2Use Reservation Book for time changes.This view shows time across the top and tables down the side, so it is easier to see whether a new time or table creates an overlap.
  3. 3Use Guests for memory, not just contact details.Guest profiles are where preferences, VIP tags, allergies, notes, and visit history should live so they can follow the guest into future reservations.
  4. 4Use Reports after you have accurate statuses.Reports depend on reservations being marked seated, completed, cancelled, or no-show correctly. If statuses are messy, the report will be messy too.

Make the basic safety check

Before making a change that affects guests or capacity, read the screen like a checklist. You are looking for the same small set of facts every time.

  1. 1Confirm the venue.If your account can access more than one restaurant, make sure the venue name in the header is the one you intend to work in.
  2. 2Confirm the date and service.A guest for tomorrow may look missing if the dashboard is on today. A lunch reservation may not appear when the dinner service is selected.
  3. 3Confirm the guest and party size.Read the name, phone, time, and covers before editing. This prevents changing the wrong person when two guests have similar names.
  4. 4Confirm table and status.A seated guest should not be cancelled, and a completed guest should not still be occupying the table. Choose the status that matches what physically happened.

Good to know

  • -Reading Help never changes reservations, tables, messages, reports, or settings.
  • -If you are training a new host, start with Dashboard, Reservations, Floorplan, and the waitlist block on the Reservations panel before giving them settings access.
Daily service dashboardRun a shift from the Service DashboardThe Service Dashboard combines the reservation list, live floorplan, service counts, alerts, and quick actions for the active shift.

What this means in service

The dashboard is the normal working screen during service. It keeps the reservation list and floorplan side by side so a host can answer phone calls, seat arrivals, move parties, message guests, and watch table status without switching screens.

The dashboard is only useful if the team keeps it current. Mark arrived when a guest is physically present, seated when they are at the table, completed when they leave, cancelled when they cancel, and no-show only when the restaurant has stopped holding the table.

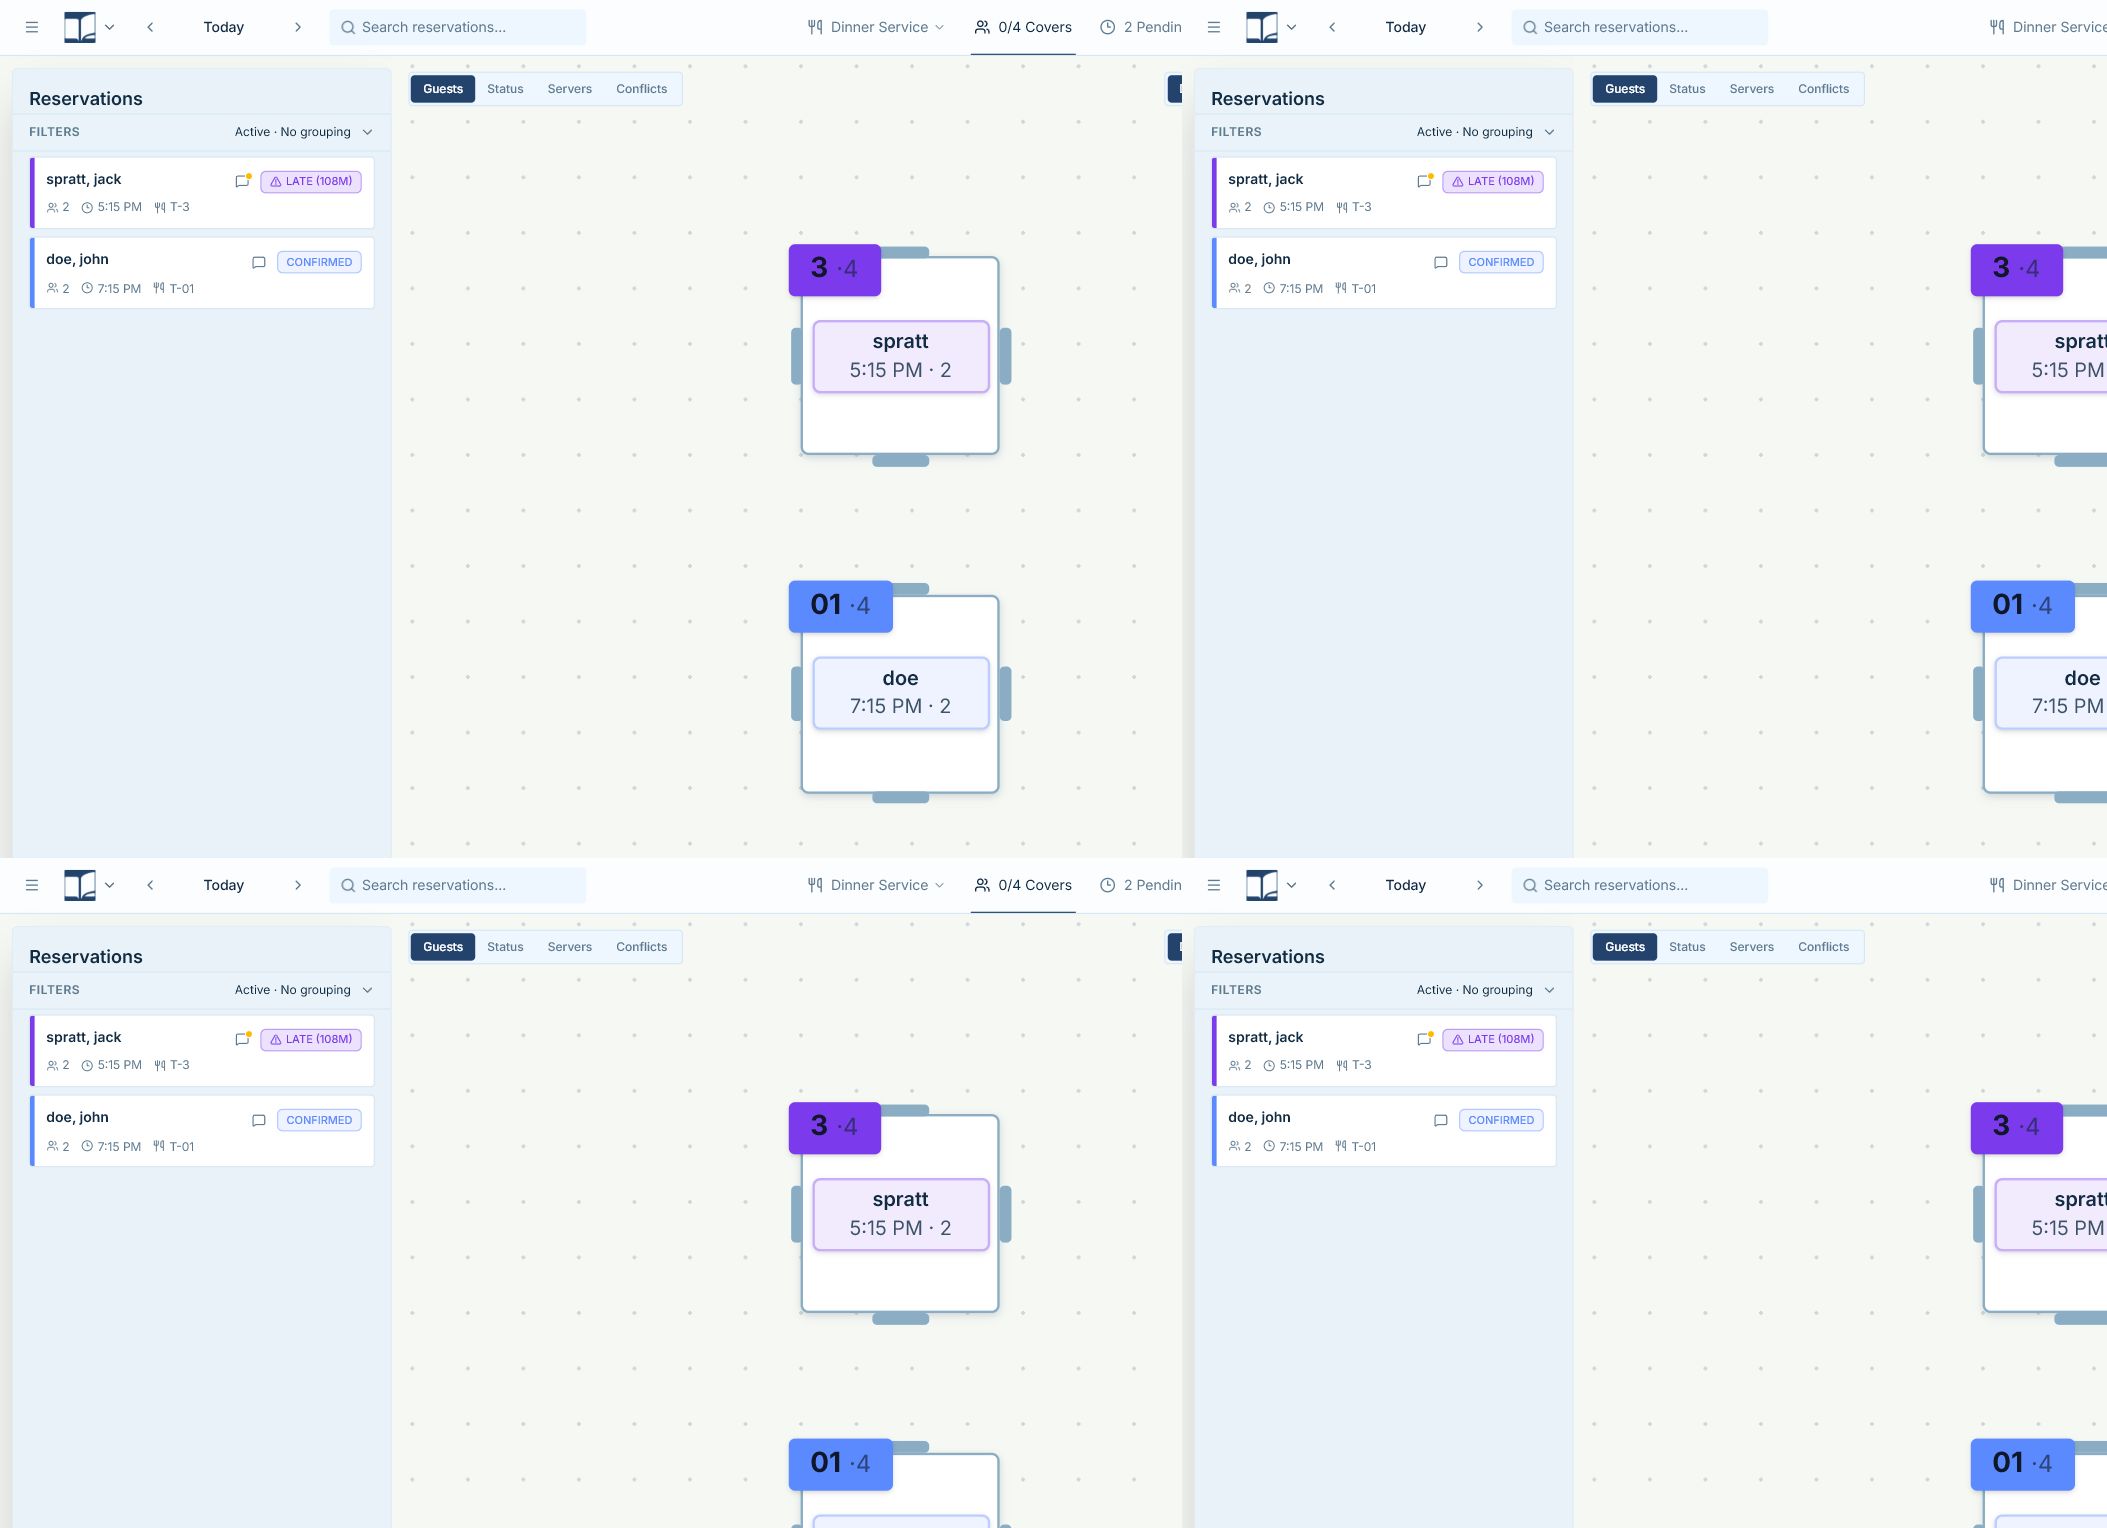
Hostbook dashboard overview with the reservation list and floorplan visible
Use the dashboard when you need the fastest picture of who is coming, who is already here, and which tables are in use.

How to read this screen

  • Start at the header. Confirm the venue, selected date, active service, seated/booked covers, pending count, and any alert badge.
  • Read the reservation list next. Cards are sorted by attention and time. A card shows guest name, party size, reservation time, table assignment, status badge, message button, and notes such as VIP or allergies.
  • Read the floorplan last. It shows the physical room, table states, upcoming bookings, conflicts, server sections, and table quick actions.
  • Open a reservation or table drawer before taking an action that you are not completely sure about. The drawer gives the context the list and map cannot fit.

What the labels and numbers mean

Seated/booked covers

The first number is covers already seated for the selected service. The second number is the booked cover count Hostbook is tracking for that service.

What to do: If the seated number is too low, check whether parties were seated without being marked seated.

Pending

Reservations that are still active and not closed out. Pending includes guests who still need some kind of service action.

What to do: Before service, pending helps you see who still needs confirmation. During service, use it to find guests who are not seated or closed yet.

Bell alerts

Alerts call out late arrivals, overdue seated guests, and turn conflicts.

What to do: Click an alert to open the related reservation when Hostbook can identify it.

Service closed message

The selected date or service period is not open for live actions.

What to do: You can review information, but seating, table assignment, new reservations, drag/drop, and walk-ins may be unavailable.

Walkthroughs

Find the right guest quickly

Use search when the guest calls, walks in, asks about a booking, or needs a change. The header search can find guests and visits beyond the currently visible list.

  1. 1Click the search field in the header.Type a guest first name, last name, phone number, or confirmation number. Use at least a few digits if searching by phone.
  2. 2Open the matching reservation or guest.A reservation result opens the booking so you can act on it. A guest result opens the guest profile if you need history or contact details.
  3. 3Check the date if the result is not visible.A guest may have a future reservation on another date. Opening the visit can move you to the correct date and Reservation Book context.

Use the live counts without misreading them

Counts are not just decoration. They are a quick warning system, but they depend on the team using statuses correctly.

  1. 1Open the covers count when the total feels wrong.The covers popover breaks down booked and seated information for the selected service. Use it to check whether the issue is booking volume or missing status updates.
  2. 2Open Pending to compare period and day totals.Period counts focus on the active service seating window. Day counts include all reservations on the date. This matters if lunch and dinner share the same day.
  3. 3Review highlighted rows.Guests sat, guests left, currently seated, cancellations, no-shows, walk-ins, same-day bookings, completed turns, and waitlist numbers are all operational clues.

Respond to an alert

Alerts are meant to interrupt you only when something may need action. Read the alert type before changing anything.

  1. 1Click the bell.Late means the reservation time has passed. Overdue means a seated party may be beyond the expected turn. Turn conflict means Hostbook sees a timing or table problem.
  2. 2Open the related reservation if available.Check the guest, time, party size, and table. Do not assume the alert means the reservation is wrong; it means it needs human review.
  3. 3Take the smallest accurate action.Mark arrived if the guest is here, no-show if the table is no longer being held, move the booking if the table plan changed, or leave it alone if the warning is acceptable.

Create a staff-entered reservation

Use New when a guest books by phone, in person, or through a staff conversation instead of the public booking page.

  1. 1Click New in the header.Hostbook opens the reservation form using the current service date as the starting point. Change the date if needed before saving.
  2. 2Enter the guest phone first when possible.Phone lookup helps find an existing guest so notes, allergies, VIP status, and past visits are not lost in a duplicate profile.
  3. 3Choose date, service, time, and party size.If the time falls outside the selected service, Hostbook can warn you or block the save until the service is corrected.
  4. 4Assign a table only if you are ready.You can save without a table if the restaurant assigns later. If you choose a table now, read capacity and conflict warnings before saving.

If this does not work: If the form will not save, look for missing guest fields, a past date, an out-of-service time, offline availability checks, blocked tables, or unresolved turn conflicts.

Good to know

  • -Use the message button on a reservation card when you only need to contact that guest.
  • -Use the megaphone for bulk service messaging when many pending guests need the same update.
ReservationsCreate, edit, seat, and close reservationsA reservation holds the guest, date, service, time, party size, table assignment, status, notes, payment/deposit state, messages, and history.

What this means in service

A reservation is the record of what the restaurant promised the guest and what happened during service. It should tell staff who the guest is, when they are expected, how many covers they bring, where they are seated, and what should happen next.

Status is the most important part of a reservation during service. Reports, alerts, cover counts, table availability, and staff handoff all depend on choosing the status that matches reality.

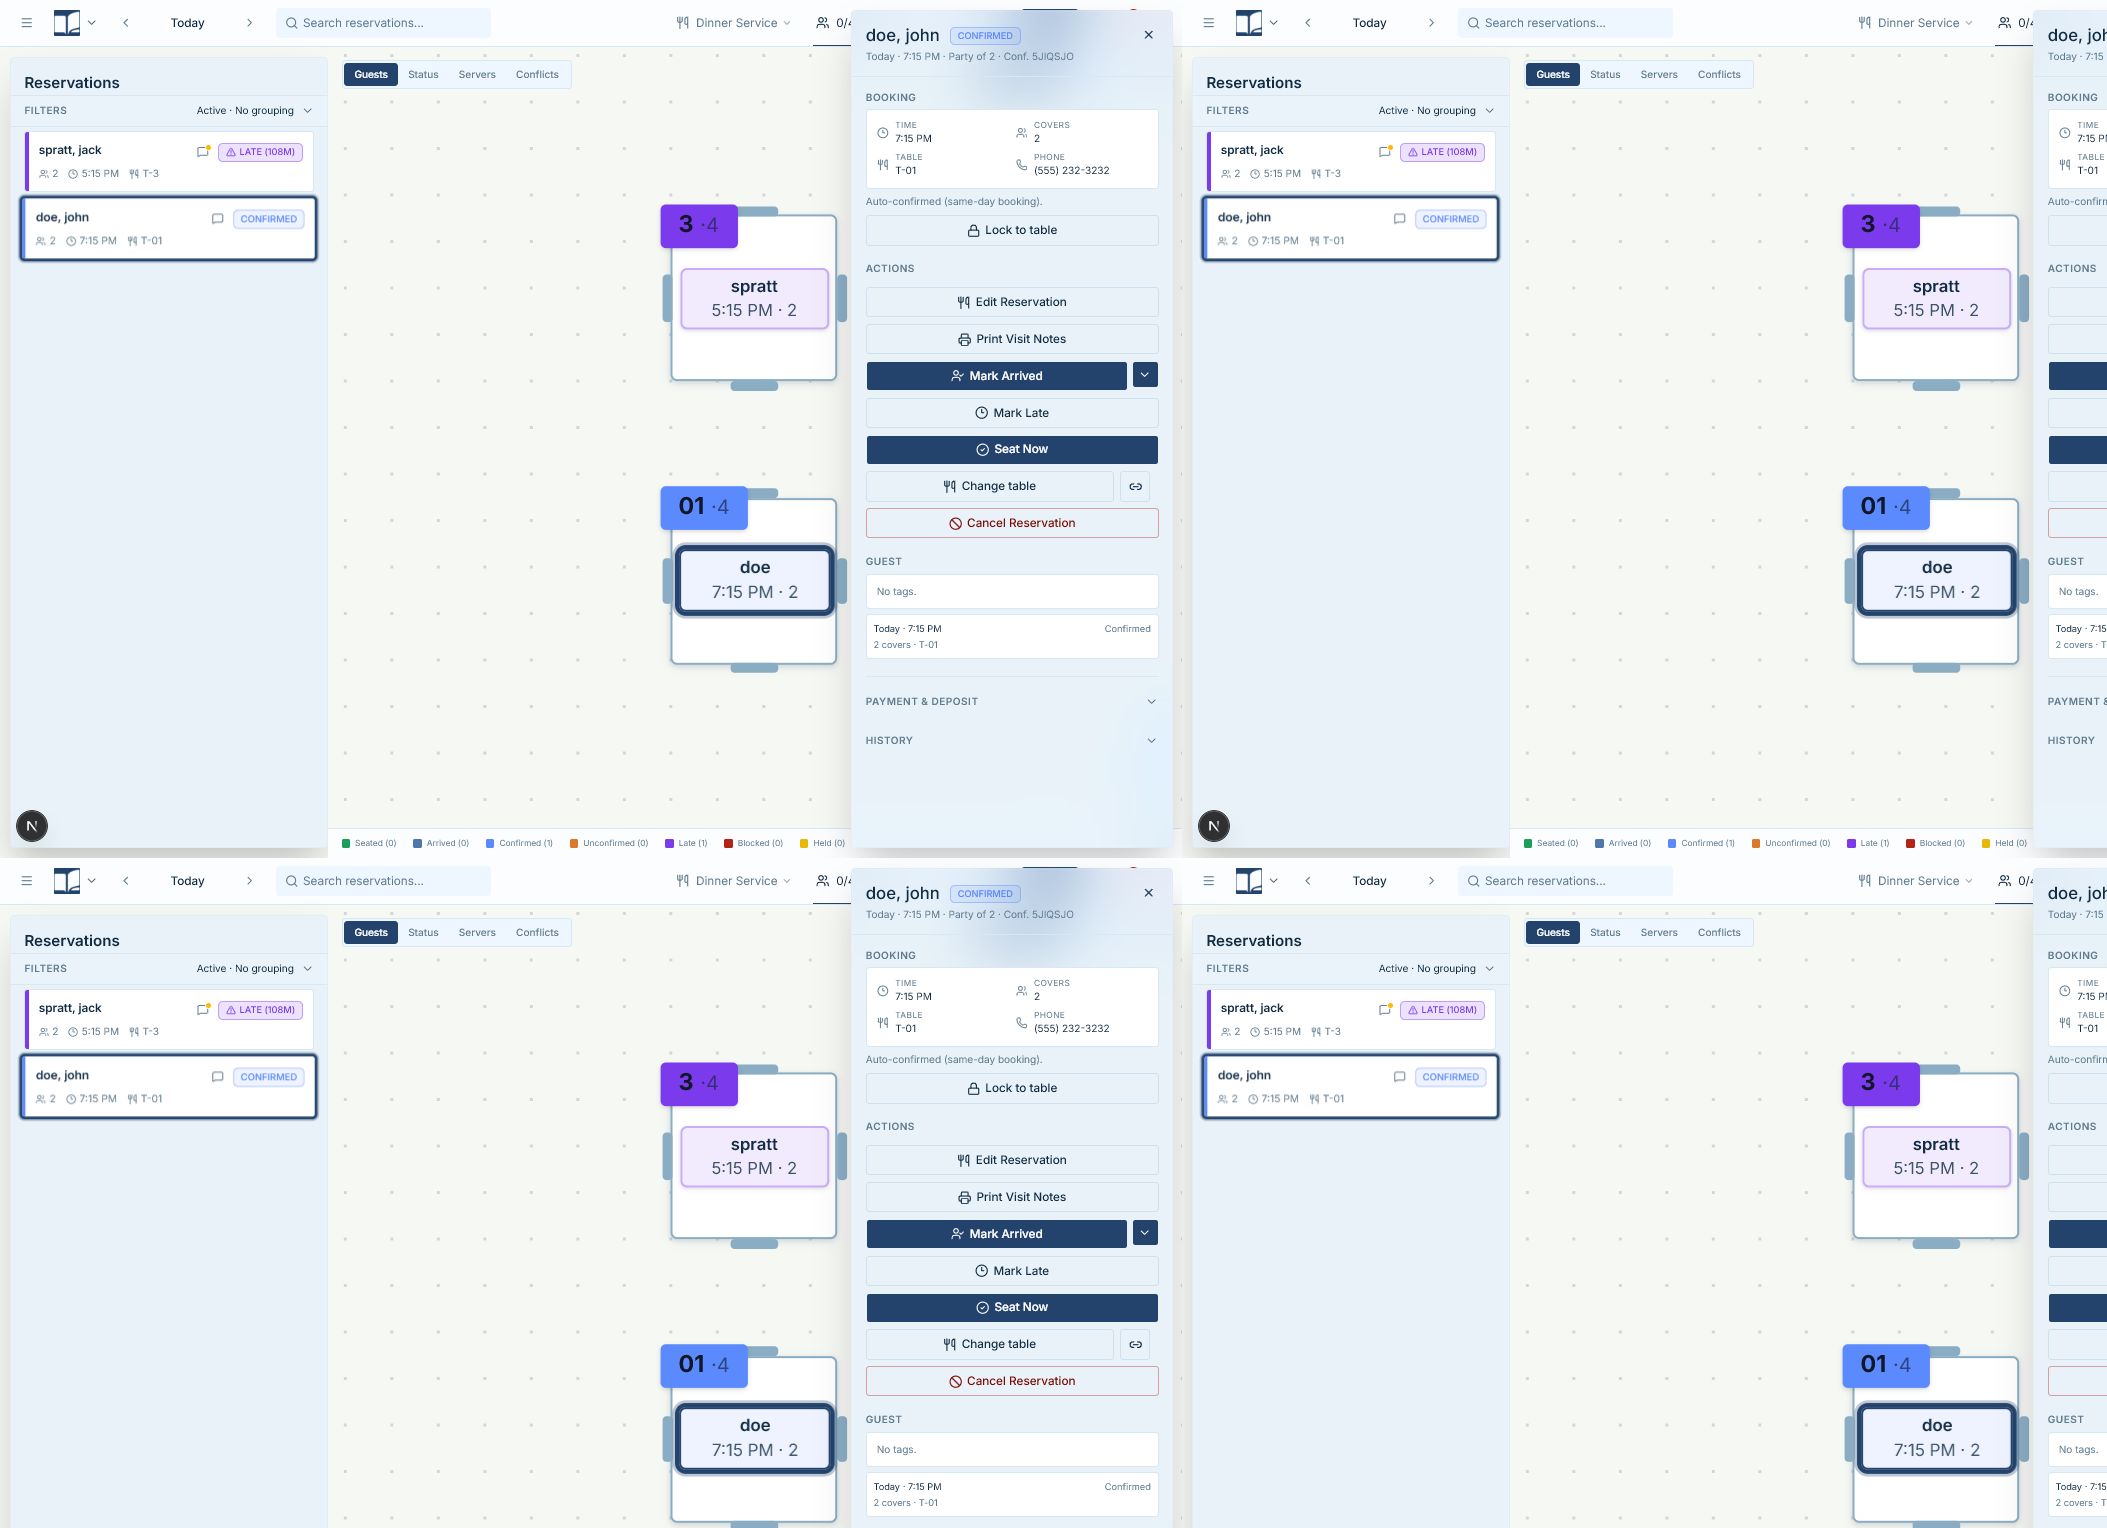
Reservation drawer showing booking details, status actions, payment and history sections
Open the reservation drawer before changing status, table, payment state, or notes.

How to read this screen

  • The reservation card gives the quick view: guest name, message button, status badge, party size, time, table label, VIP/allergy/note indicators, and sometimes seat actions.
  • The drawer gives the safe view: booking details, phone, table, notes, confirmation state, table lock, status actions, guest history, payment/deposit state, and reservation history.
  • If a reservation has no table, the card shows No table. That is a prompt to assign a table before seating unless the restaurant intentionally assigns at arrival.
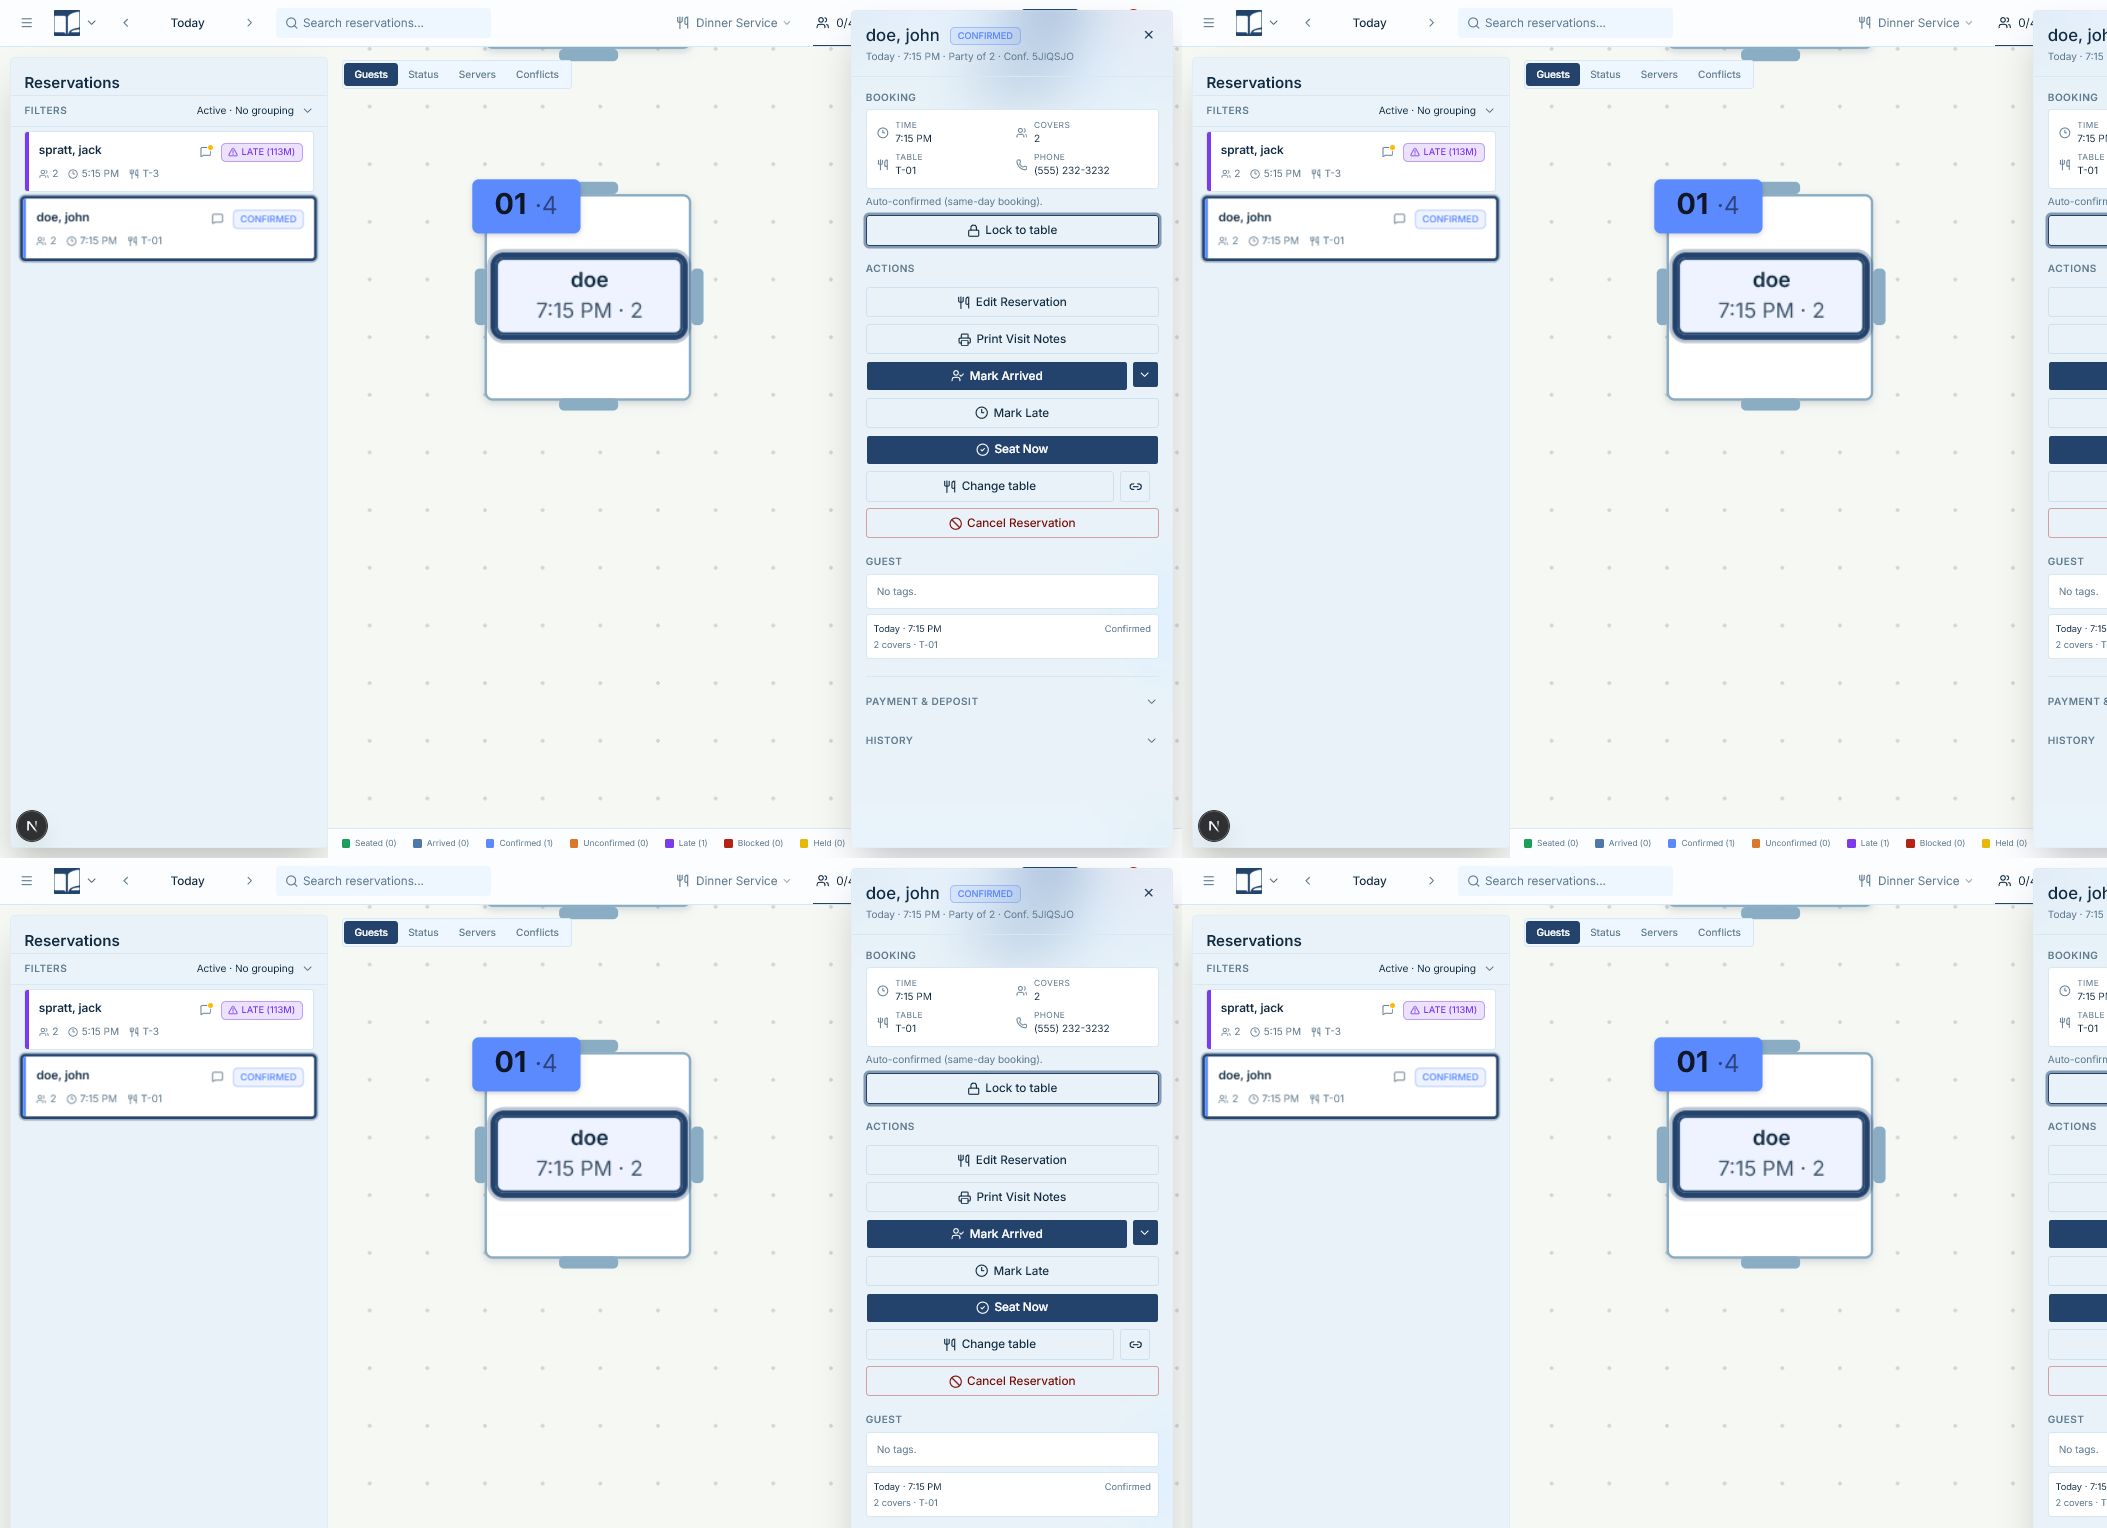
  • If the table is locked, Hostbook protects it from being moved by normal drag or assignment actions until someone unlocks it.

What the labels and numbers mean

Unconfirmed

The reservation exists but the guest has not been confirmed by staff or guest link.

What to do: Confirm it when staff have verified the guest still plans to come.

Confirmed

The guest is expected, but they are not physically present yet.

What to do: Mark arrived when the party checks in.

Late

Hostbook considers the guest late when the reservation time has passed far enough to require attention.

What to do: Call or message if appropriate, then mark arrived, cancel, or no-show based on what happens.

Arrived

The party is at the restaurant but not seated yet. Arrival labels can further clarify arrived, partially arrived, partially seated, or at the bar.

What to do: Seat them when the table is ready, or unarrive if the arrival status was marked by mistake.

Seated

The guest is currently occupying a table. This affects floorplan status and cover reporting.

What to do: Move, unseat, return to pool, or mark completed when the physical situation changes.

Completed

The party has finished and should no longer occupy the table.

What to do: Use this only when the table should be released from active service tracking.

Cancelled

The guest cancelled or staff cancelled the booking before it was completed.

What to do: Choose cancelled when the booking should remain in history but should not count as served covers.

No-show

The guest did not arrive and the restaurant is no longer holding the table.

What to do: Use only after the restaurant's hold policy has been followed.

Walkthroughs

Create a reservation from a call

A phone booking should leave enough detail that any host can understand it later without asking the person who took the call.

  1. 1Open New and enter phone first.If Hostbook finds a matching guest, choose that guest so existing notes, allergies, VIP status, and preferences stay attached.
  2. 2Enter name, date, service, time, and party size.These fields determine availability, timeline placement, cover counts, and the service period where the reservation appears.
  3. 3Add notes that staff can act on.Use reservation notes for this visit, such as patio request or birthday. Use guest notes for lasting preferences, such as favorite booth or allergy context.
  4. 4Choose table assignment timing.Assign now when the table plan is known. Leave unassigned when the restaurant prefers to assign at service or when the best table depends on how the room opens.
  5. 5Read warnings before saving.Capacity warnings, blocked tables, turn conflicts, and out-of-service times are there to prevent overbooking or seating promises the restaurant cannot keep.

Seat an arrived guest

Seat Now means the guest is physically going to the table. It is not the same as confirming the booking.

  1. 1Mark the guest arrived.Use Mark Arrived when the party checks in. If only part of the party is here or they are waiting at the bar, use the arrival options so other staff understand the situation.
  2. 2Check or choose the table.If the reservation already has a table, confirm it is still right. If not, use Assign and Seat or Link and Seat to pick one or more tables.
  3. 3Confirm seating.Hostbook changes the reservation to seated, connects it to the table, updates the floorplan, and starts the seated timing used by drawers and reports.
  4. 4Do not seat a guest who is not physically going to the table.If the guest is waiting, keep them arrived or at the bar. Seating early makes the table look occupied and can distort turn timing.

Move or protect a table assignment

Changing tables affects the floorplan, availability, and staff expectations. Use table lock when a guest must stay on a particular table.

  1. 1Open the reservation drawer.Check the current table, party size, status, and notes before changing the table. This avoids moving a guest with a special request by accident.
  2. 2Use Assign a table or Change table.Choose single-table assignment for one table. Use linked tables when the party needs combined capacity across multiple physical tables.
  3. 3Use Lock to table for protected assignments.A locked reservation cannot be moved by normal drag/drop until it is unlocked. Use this for VIPs, accessibility needs, buyouts, or manager-approved fixed seating.
  4. 4Read conflict prompts.A conflict might mean overlapping reservations, party size mismatch, hidden table, blocked table, or a table already in use. Pick another table unless a manager intentionally overrides.

Close a reservation correctly

Closing statuses control reports. If staff skip this step, the room may look busier or cleaner than it really was.

  1. 1Use Completed when the seated party leaves.Completed releases the active table tracking and counts the reservation as a completed turn for reports when timing data is available.
  2. 2Use Cancel Reservation for a cancellation.Cancelled reservations stay in history but do not count as served covers. Cancellation payment policies may create a fee or refund note.
  3. 3Use No-Show when the guest does not arrive.No-show is available only when Hostbook considers the reservation eligible based on timing. It records lost covers in reports.
  4. 4Use Unseat or Return to pool only to correct the active floor.Unseat reverses an accidental seating action. Return to pool releases a table while keeping the guest active for reassignment.

Track payment and deposit status

Payment status in this version is a tracking field. It records what staff know about deposits, fees, refunds, and card-on-file state. It does not charge cards by itself.

  1. 1Open Payment & deposit in the drawer.Read the current label before changing it: no policy applied, card on file, deposit pending, deposit paid, refund needed, fee pending approval, fee charged, fee waived, or refunded.
  2. 2Choose the new status.Pick the status that describes the real administrative state. Do not mark paid, charged, waived, or refunded unless that decision has actually been made.
  3. 3Use manager approval where required.Fee charged, fee waived, and refunded are manager-level decisions. Hostbook may require approval and can show who approved it.
  4. 4Check policy notes.Large-party or holiday deposits, no-show fees, cancellation fees, and refund-needed messages appear as reminders so staff know why the payment state matters.

Good to know

  • -Reservation history records actions so managers can understand what changed and when.
  • -Print Visit Notes is useful when host, kitchen, or manager needs a physical reminder for the booking.
FloorplanRun the room from the floorplanThe floorplan is the live map of rooms and tables. It is where physical seating, table status, linked tables, conflicts, and server sections become visible.

What this means in service

The floorplan is not decoration. It controls the physical state of service. When a table is seated, held, blocked, linked, or assigned to a server section, that information guides hosts and managers and can affect availability decisions.

Think of the floorplan as a live map. A table tile tells you the table number, capacity, current guest or status, upcoming bookings, and warning state. Clicking a table opens quick actions; opening Details gives the full drawer.

Floorplan view showing tables, mode controls, and table quick actions
Use the floorplan when the physical table matters: seating, moving, holding, blocking, or balancing sections.

How to read this screen

  • Use room tabs to switch between rooms such as Dining Room, Patio, or Bar. If the map looks empty or cut off, use Fit to bring the room back into view.
  • Use Guests mode to read guest badges on tables. Badges show current and upcoming guest information and use reservation status colors such as seated, arrived, confirmed, unconfirmed, or late.
  • Use Status mode to read meal or table progress: available, seated, appetizer, main course, dessert, billed, paid, held, or blocked.
  • Use Servers mode to see server sections, section outlines, server names, table counts, cover load, and turn load. This is the view for balancing work across the room.
  • Use Conflicts mode to highlight tables with party-size problems, overlaps, occupied-table problems, or other assignment warnings.

What the labels and numbers mean

Table number

The identifier staff use to talk about the table. The number on the map should match the physical room.

What to do: If the number is wrong, fix it in floorplan setup rather than training staff around the error.

Capacity

How many guests the table is meant to seat. Capacity warnings compare the reservation party size to this number or linked-table capacity.

What to do: Do not ignore capacity warnings unless a manager has intentionally approved the setup.

Linked tables

Multiple physical tables are being used together for one reservation or walk-in.

What to do: Use the link action when one table is not enough, then choose all tables before confirming.

Held

A table is reserved from normal use for a service, until end of day, until manually released, or for a custom time window.

What to do: Release the hold when the table can be used again.

Blocked

A table cannot be booked or seated until the block is released.

What to do: Use blocked for broken furniture, private use, or tables removed from service.

Walkthroughs

Move around and reset the room view

Before seating, make sure you are looking at the correct room and can see the relevant tables. A wrong room tab is an easy way to think a table is missing.

  1. 1Select the room tab.Choose the room where the table physically lives. A dining room, patio, and bar may each have different tables and sections.
  2. 2Use zoom only when it helps you see detail.Zoom in to read dense areas. Zoom out when you need the full room. If you get lost, Fit recenters the room around the visible table layout.
  3. 3Pan the map to inspect another area.Drag the floorplan background when you need to see tables that are outside the current viewport. Avoid dragging reservation cards unless you intend to move them.

Seat a guest who already has a table

Start here when the reservation card already shows a table and the party is ready to be seated.

  1. 1Mark the reservation arrived first.This tells the team the party is present but not yet seated. If the guest is only partially present, use the arrival option that best describes that situation.
  2. 2Check the assigned table on the floorplan.Confirm the table is available or intentionally ready. Look for a current guest, held/block state, or conflict highlight before seating.
  3. 3Click Seat Now.Hostbook changes the reservation to seated, shows the guest on the table, and starts seated timing used by table drawers and reports.
  4. 4Open Details if something looks off.The table drawer shows current guest, turn progress, upcoming bookings, previous bookings, and move/complete actions.

Assign and seat a guest with no table

A reservation without a table is not ready to seat until you choose where that party will go. Hostbook gives single-table and linked-table flows.

  1. 1Choose Assign and Seat or Link and Seat.Use Assign and Seat for one table. Use Link and Seat when the party needs two or more tables pushed together.
  2. 2Select the table or tables on the floorplan.Selected tables should provide enough capacity and should not conflict with current or upcoming reservations.
  3. 3Read the warning severity.A warning might be manageable, such as a tight turn. An error may mean blocked table, hidden table, occupied table, or overlap that should not be allowed.
  4. 4Confirm only after the physical room matches the screen.If staff are still clearing or moving tables, wait until the actual table is ready before marking the guest seated.

Seat a walk-in from the floorplan

Use floorplan walk-in seating when the table is ready now and speed matters more than a full reservation intake.

  1. 1Click an available table.The quick-action menu appears near the table. Seat walk-in is disabled if the table is already seated, held, or blocked.
  2. 2Choose Seat walk-in.Pick the party size. Hostbook creates a walk-in record and seats it to the table immediately.
  3. 3Use the link icon for combined tables.If one table is not enough, use Link tables for walk-in, select the additional tables, click Done, then choose the party size.
  4. 4Add notes later if needed.If the walk-in needs allergy, VIP, or contact information, open the reservation or guest details after seating and add the useful information.

Change table status during service

Status mode lets staff track table progress without opening the full reservation. This is useful when managers are watching turns and pacing.

  1. 1Click a table and choose Change status.Available statuses include appetizer, main course, dessert, billed, paid, held, and blocked depending on the current table state.
  2. 2Choose the progress that matches the table.Meal progress statuses are meaningful only when a guest is seated. Hostbook disables choices that do not make sense for the current state.
  3. 3Use Held when the table should be saved.Choose hold for this service, hold until end of day, hold until unheld, or custom hold time. Held tables are visible so staff understand why they should not seat there.
  4. 4Use Blocked when the table cannot be used.Blocked is stronger than held. It means the table should not be booked or seated until someone releases the block.

Move a seated guest

Move Guest is for a real physical move after a guest is already seated. It is different from changing a future table assignment.

  1. 1Open the current table or reservation drawer.Check whether the reservation is locked to the table. If locked, a manager or authorized user must unlock it before moving.
  2. 2Choose Move Guest.Hostbook starts an assignment flow. Select the destination table on the floorplan.
  3. 3Confirm the destination table is ready.Do not move the guest onto a held, blocked, occupied, or conflicting table unless the manager has accepted that decision.
  4. 4Review the floorplan after the move.The old table should no longer show that guest, and the new table should show the seated party.

Respond to a conflict instead of guessing

A conflict is Hostbook saying, 'This might not work.' It does not always mean the user did something wrong, but it always deserves attention.

  1. 1Identify the conflict type.Look for party size, overlapping turn window, hidden table, blocked table, occupied table, or linked-table capacity issues.
  2. 2Choose the safest correction.Try a different table, different time, linked tables, or a hold release before using an override.
  3. 3Use manager override only for an intentional decision.An override should mean the restaurant has a real-world plan for the conflict, not that the warning was skipped because the user was in a hurry.

Good to know

  • -Server section outlines can be changed between blob, block, and line styles. The choice is visual only; the section assignments are what reports use.
  • -Scheduled alternate floorplans are managed in floorplan setup. Once service is live, schedule changes may be locked to protect the active service.
Reservation BookUse the Reservation Book timelineThe Reservation Book shows the service day as a timeline: tables run down the side, time runs across the top, and reservations appear as blocks.

What this means in service

The Reservation Book is the planning view. It is best before service, during a pacing discussion, or any time you need to see whether a table can handle one more booking without colliding with another.

Every move in the timeline changes the live reservation. Dragging sideways changes time. Dragging vertically changes table. Dragging the edge changes the dining duration. Use it carefully.

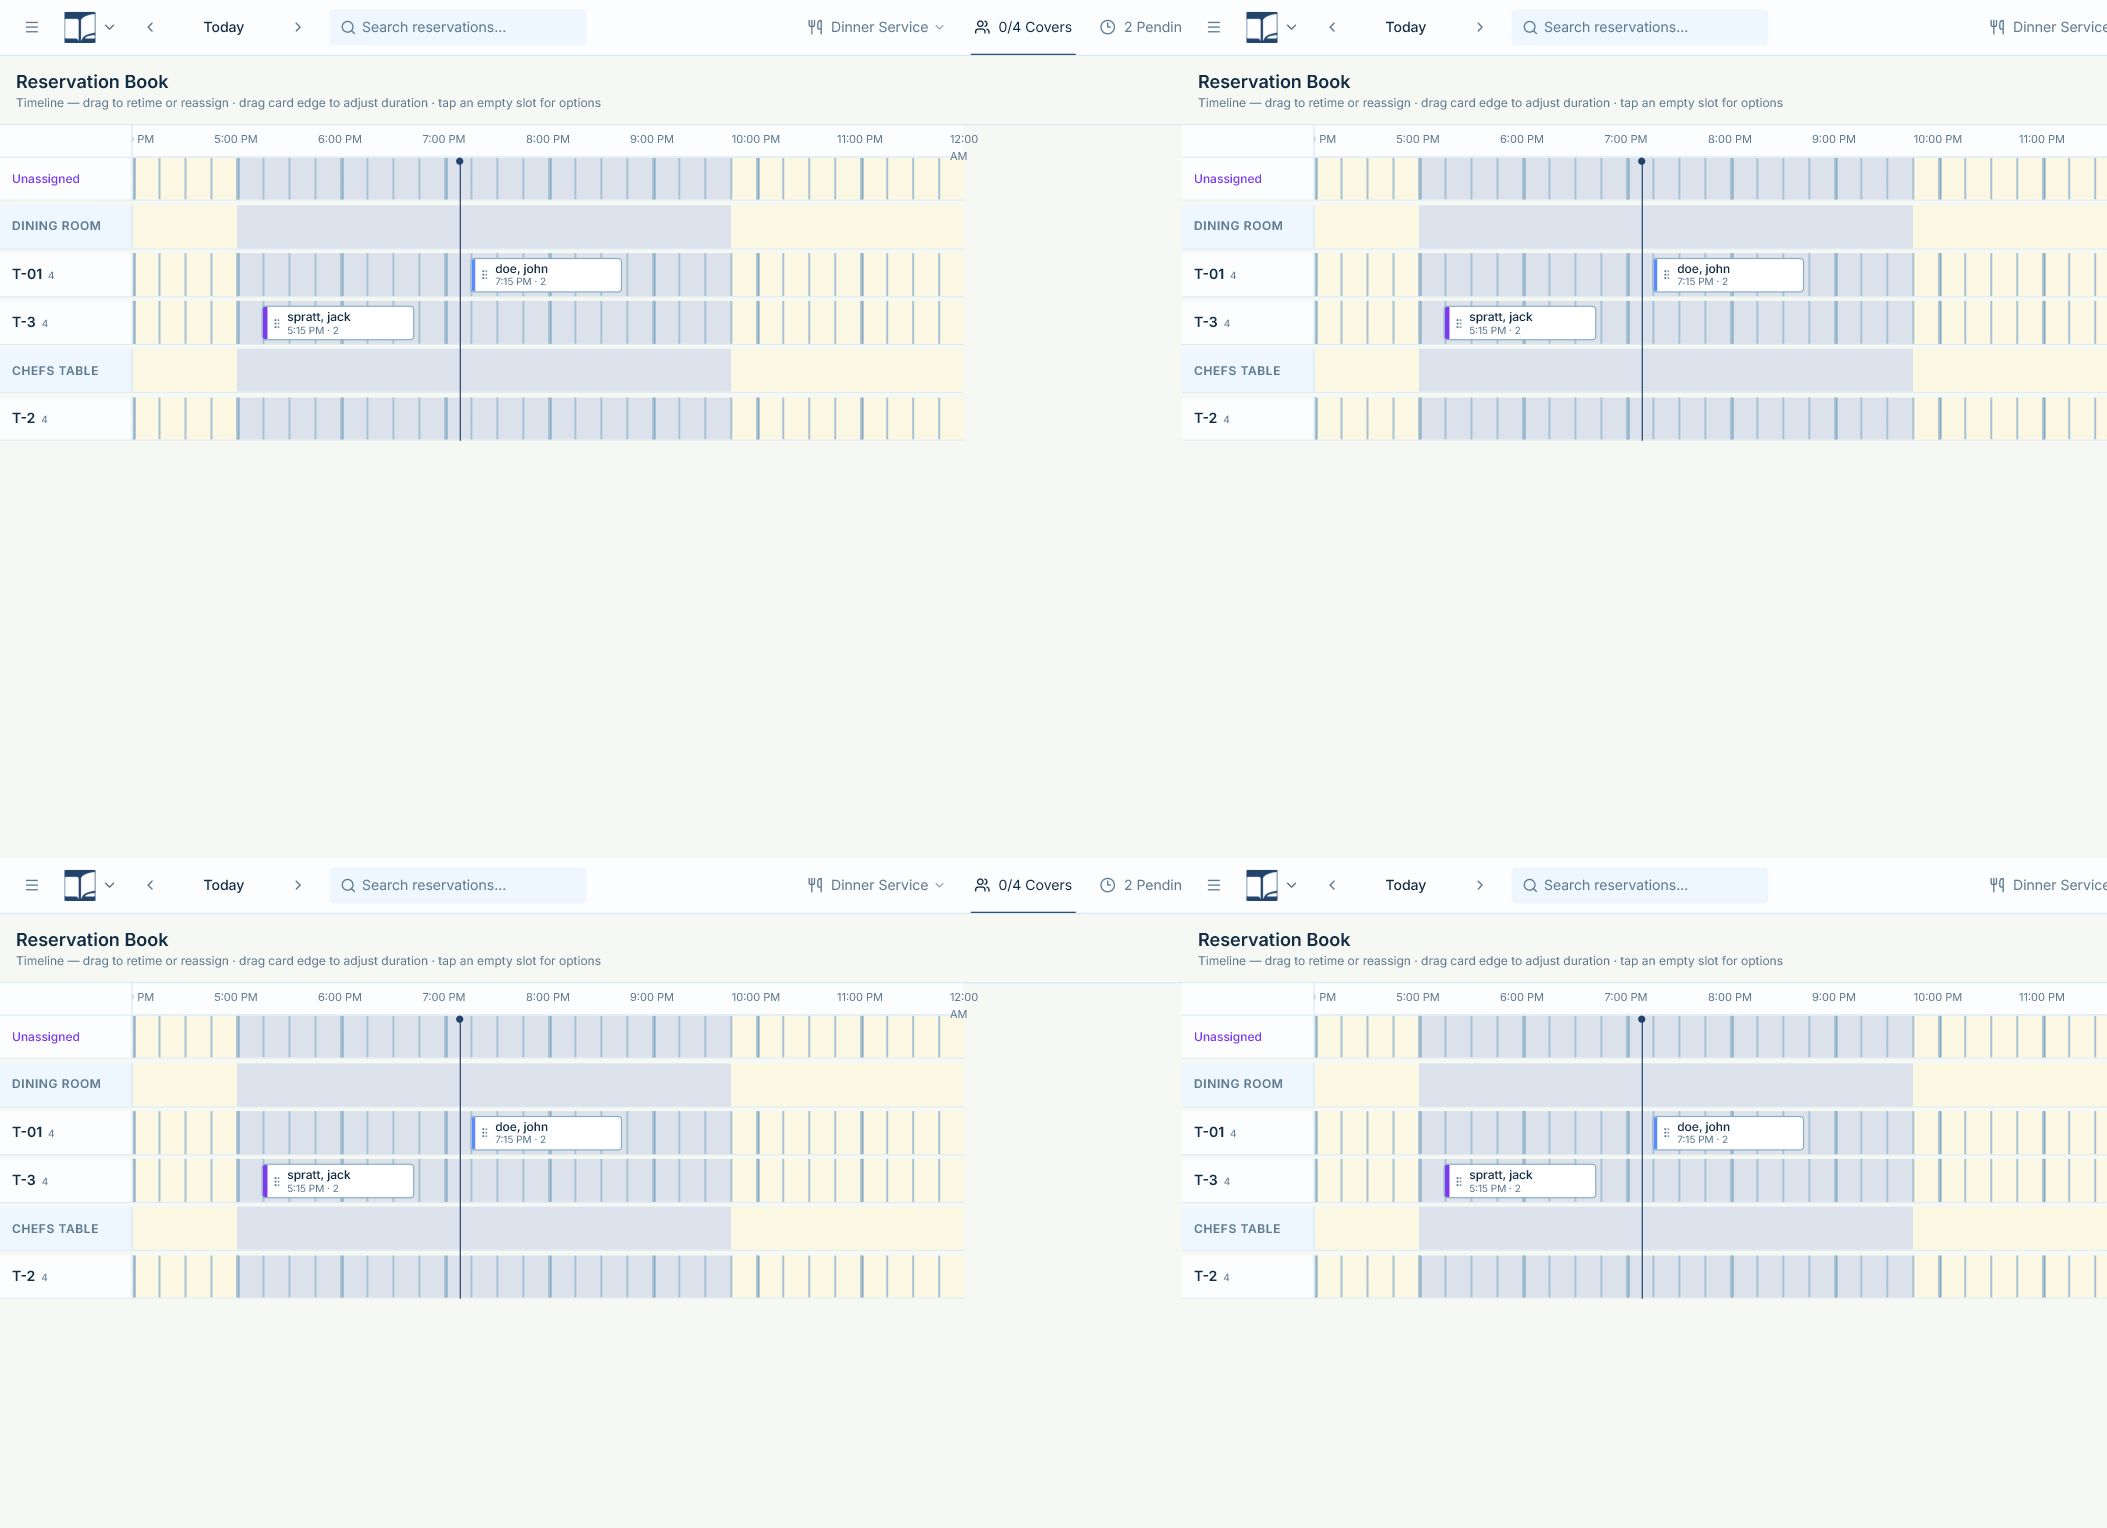
Reservation Book timeline with table rows, time columns, and reservation blocks
Use the Reservation Book when time, turn length, or table reassignment matters more than room shape.

How to read this screen

  • Rooms and tables are listed down the left side. Room rows group the table rows below them. The Unassigned row holds reservations that do not yet have a table.
  • Time runs across the top in service slots. The current-time line appears when you are viewing today's active service window.
  • Reservation blocks show guest name, time, party size, status accent, linked-table icon when relevant, and lock icon when the reservation is locked to a table.
  • Held and blocked table windows appear as overlays. Special event blocks appear across affected tables so you can see when public event inventory occupies capacity.

What the labels and numbers mean

Unassigned row

Reservations that have a time and party size but no table assignment.

What to do: Assign these before service if the restaurant does not assign at arrival.

Reservation block width

How long Hostbook expects the party to occupy the table for that turn.

What to do: Drag the right edge only when you intentionally change the expected dining duration.

Linked icon

The reservation uses more than one table.

What to do: Check all linked rows before moving the reservation so you do not split an intended combined table.

Lock icon

The reservation is locked to its table and cannot be moved through normal timeline drag.

What to do: Unlock from the reservation drawer only if the protected assignment no longer applies.

Walkthroughs

Review the day without vague scanning

Reviewing the book means comparing each table's time blocks against the service flow. You are looking for open gaps, tight turns, unassigned parties, and tables that are carrying too much work.

  1. 1Start with the date and service window.Make sure the timeline is showing the day you intend to review. A perfectly clean book on the wrong date is not useful.
  2. 2Read the Unassigned row first.Any booking here still needs a table. If service is near, this row tells the host which reservations need planning before guests arrive.
  3. 3Read table rows from left to right.Each block shows when a table is expected to be occupied. Look for blocks that touch or overlap, because they leave little reset time.
  4. 4Compare nearby tables in the same room.If one table has several turns and a similar table nearby is empty, you may be able to rebalance assignments before the rush.
  5. 5Check held, blocked, and event overlays.These overlays explain why a table that looks empty may not actually be available.

Create a reservation at a specific slot

Use the empty-slot action when you already know the table and time you want.

  1. 1Find the table row.Use the room grouping and table number on the left. Check the capacity shown beside the table label before choosing it for a party.
  2. 2Click the empty time slot.Hostbook opens quick actions for that table and time. Choose Add reservation.
  3. 3Complete the reservation form.The selected table and time should already be filled in. Add guest, phone, date, service, party size, notes, allergies, and occasion as needed.
  4. 4Review warnings before saving.The timeline can still warn about overlap, blocked tables, service windows, or capacity. The visual slot is a starting point, not a guarantee.

Move a reservation in time or table

Drag only when you mean to change the booking. If you are just reading details, click the block instead.

  1. 1Drag sideways to change time.Move the block left for earlier or right for later. The timeline snaps to service slots so the new time stays aligned with the book.
  2. 2Drag up or down to change table.Drop the block on a different table row to reassign it. Hostbook checks whether that table can take the party during the turn window.
  3. 3Watch for warning messages.A warning can appear if the target table is blocked, held, occupied, too small, outside an event window, or overlapping another active reservation.
  4. 4Open the drawer after an important move.For guest-facing changes, open the reservation to confirm the new time/table and message the guest if the restaurant needs to notify them.

Adjust dining duration

Duration controls how long the reservation occupies the table in the planning grid. This affects overlap checks and turn planning.

  1. 1Hover the right edge of the block.When the resize handle appears, drag the edge left or right to shorten or lengthen the expected turn.
  2. 2Use duration changes for real dining expectations.A quick lunch, long tasting menu, large party, or guest-specific usual duration may justify changing the expected time.
  3. 3Save a guest's usual duration only when it is meaningful.If Hostbook asks whether to save a duration as the guest's usual time for that party size, accept only when it reflects a pattern you want remembered.

Good to know

  • -Completed and locked reservations are intentionally harder to adjust from the timeline.
  • -If a drag does nothing, check whether the service is closed, the reservation is completed, or the table is locked.
GuestsUse guest profiles as restaurant memoryGuest profiles store contact details, preferences, notes, tags, allergies, occasions, and visit history.

What this means in service

The guest profile is where hospitality details should live after one service ends. A reservation note helps with one visit; a guest note helps every future visit.

Use guest information carefully. The best notes are factual, respectful, and useful to staff. Avoid private opinions or anything the next staff member cannot act on.

How to read this screen

  • Search by name or phone number before creating a new profile. Duplicate profiles make history and preferences harder to trust.
  • Tags are for fast recognition. VIP, allergy, regular, first-time, and occasion tags are useful only when staff understand and act on them.
  • Visit history helps staff see previous bookings, cancellations, no-shows, and patterns without leaving the guest profile.

What the labels and numbers mean

Guest notes

Longer-term notes about the person, such as seating preference, accessibility need, or service style.

What to do: Use when the detail should follow the guest into future visits.

Reservation notes

Notes about one booking, such as birthday, high chair, patio request, or late arrival call.

What to do: Use when the detail matters only for this visit.

Allergy tags

Fast warning labels that appear in service contexts.

What to do: Use the structured allergy selector where possible, and add extra detail in notes when staff need more context.

VIP

A service attention tag. It should mean the restaurant wants staff to notice this guest quickly.

What to do: Use consistently so the tag remains meaningful.

Walkthroughs

Find and update a returning guest

Search first, then edit. This keeps history attached to the same person and prevents staff from splitting notes across multiple profiles.

  1. 1Open Guests from the sidebar.Use the search field to enter the guest name or phone number. Phone is usually the strongest match when names are common.
  2. 2Open the profile and review existing details.Read notes, tags, allergies, and recent visits before adding new information. You may find the detail already exists.
  3. 3Update the correct field.Put lasting preferences in guest notes. Put one-time instructions in the reservation note for the active booking.
  4. 4Save before leaving.If you navigate away without saving, the next reservation may not show the updated preference or warning.

Write notes staff will actually use

Good notes are short enough to read during service but specific enough to change behavior.

  1. 1Lead with the action.Write 'prefers booth when available' instead of a long story about why. Write 'peanut allergy, confirm with kitchen' instead of only 'allergy'.
  2. 2Keep private opinions out.Notes should help service and safety. Avoid comments that are subjective, insulting, or not useful for the next staff member.
  3. 3Use tags for scanning.Tags help staff notice important information on cards. Notes explain the detail behind the tag.

Handle duplicate guests carefully

Duplicate profiles can happen when a guest books with a different phone, spelling, or staff entry. Merge only when you are confident they are the same person.

  1. 1Compare phone, name, and visit history.Do not merge just because two guests share a last name. Confirm the records truly belong together.
  2. 2Choose the profile to keep.Keep the profile with the most complete contact details and useful notes.
  3. 3Review what will move.Reservations, waitlist entries, tags, and notes may be consolidated. If anything looks suspicious, stop and ask a manager.

Good to know

  • -The goal is not to collect every possible fact. The goal is to remember the details that improve service and safety.
Waitlist and walk-insManage walk-ins and waiting guestsThe waitlist lives at the top of the Reservations panel and tracks guests who are waiting for a table with either a quoted wait or a preferred time.

What this means in service

The waitlist is for guests who are not seated yet. They may be waiting in the restaurant, nearby, or reachable by phone depending on your house process.

A walk-in can be a full named guest with phone number and notes, or an anonymous walk-in when the restaurant needs speed and does not need contact details.

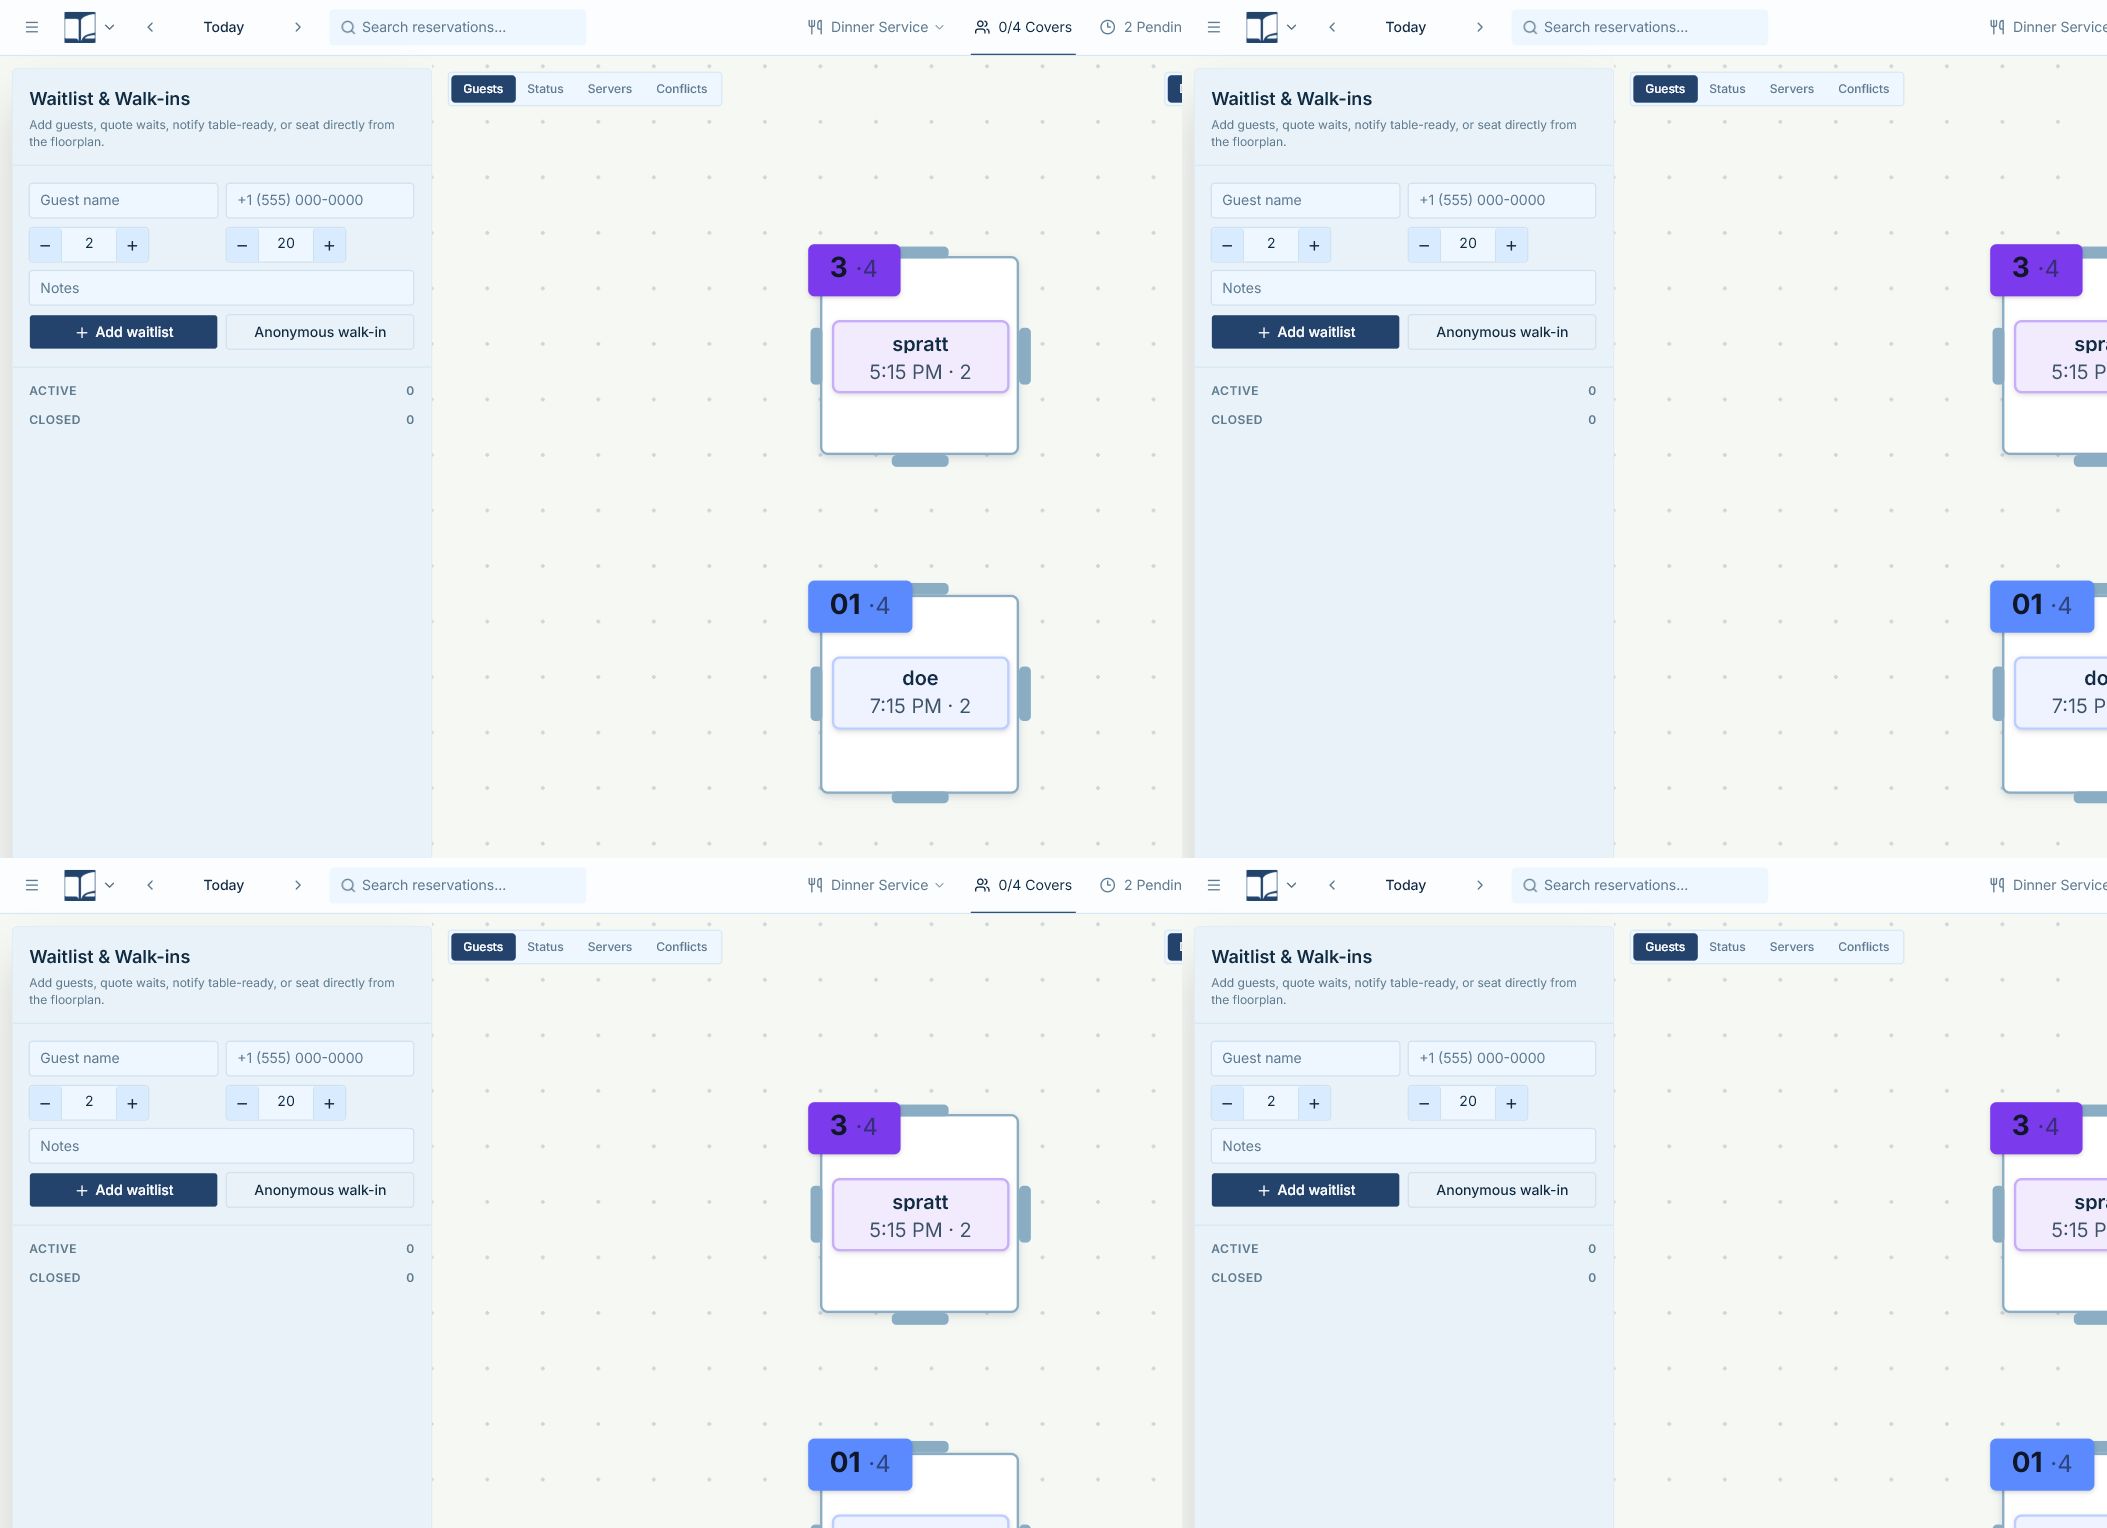
Waitlist panel showing active entries, quote controls, ready, seat, and mark left actions
Use the waitlist to keep walk-ins visible while the room turns over.

How to read this screen

  • On the Service Dashboard, open the waitlist hourglass button beside Reservations to add a guest. The form matches a new reservation but without table assignment.
  • Choose Walk-in when you are giving a minute estimate, or Reserve Time when the guest wants a specific time window.
  • Active waitlist cards appear in the collapsible Waitlist section above reservation filters. Each card shows party size, estimated wait or reserve time, notes, and promotion actions.
  • Table Available promotes Walk-in guests when a table is ready. Confirm Availability does the same for Reserve Time guests. Both assign a table on the floorplan and move the guest into the regular reservation list immediately.

What the labels and numbers mean

Walk-in

The guest is waiting for the next suitable table and was given an estimated wait in minutes.

What to do: Update the estimate as conditions change, then use Table Available when ready.

Reserve Time

The guest asked to be seated around a preferred time rather than a minute quote.

What to do: Use Confirm Availability when you can honor that time and assign a table.

WAITLIST tag

After promotion, the guest is in the regular reservation list but still shows a WAITLIST tag instead of confirmed or unconfirmed.

What to do: Treat them like any other active reservation for seating and messaging.

Leave

The guest left before being seated.

What to do: Mark left so the active waitlist does not stay inflated.

Walkthroughs

Add a named waitlist guest

Use a named entry when you may need to call or text the guest, recognize them later, or keep notes about their request.

  1. 1Open Add to waitlist from the Reservations header.The waitlist form opens from the hourglass button beside Reservations on the Service Dashboard.
  2. 2Enter name and phone.Phone is important if the guest may leave the host stand before their table is ready.
  3. 3Choose Walk-in or Reserve Time.Walk-in is for minute estimates. Reserve Time is for guests waiting for a specific time.
  4. 4Click Add to waitlist.The guest appears in the Waitlist section and can be promoted or marked left.

Use anonymous walk-in for speed

Anonymous walk-in is for quick seating when the restaurant does not need guest contact information first.

  1. 1Choose Anonymous walk-in.Hostbook creates a walk-in entry without name or phone. Use this for fast turn-and-burn service or when the party is going straight to a table.
  2. 2Set party size accurately.Party size affects table fit, covers, and reports. Do not use party of 2 as a default if the party is larger.
  3. 3Seat from the floorplan or waitlist.If seating immediately, picking the table on the floorplan is fastest. If they are waiting, keep them in Active until the table is ready.

Promote or close a waitlist guest

The waitlist should stay honest. If wait conditions change, update the quote. If the guest leaves, close the entry.

  1. 1Update the quote when the room changes.For Walk-in guests, change the estimated minutes on the card. This keeps the list aligned with what staff told the guest.
  2. 2Click Table Available or Confirm Availability.This opens the floorplan so you can select a table. The guest moves into the regular reservation list right away. A confirmation text may be sent when a phone number is on file.
  3. 3Click Leave when the guest gives up.This removes the guest from the active waitlist and keeps end-of-service waitlist reporting accurate.

Good to know

  • -A long active waitlist that includes people who already left makes hosts overestimate demand.
MessagesSend and understand guest messagesMessages record confirmation, reminder, cancellation, waitlist-ready, failed SMS, retry, and bulk service communication.

What this means in service

Messages are part of the guest record. They help staff see whether Hostbook requested confirmation, whether a guest confirmed by link, whether staff confirmed manually, and whether delivery failed.

Do not treat a queued or recorded message as proof that the guest saw it. Always read the delivery state and use common sense for urgent service changes.

How to read this screen

  • The message button on a reservation card opens a message action for one guest.
  • The megaphone in the header opens bulk service messaging for a group of pending reservations.
  • The reservation drawer shows confirmation status, failed delivery warnings, retry action when available, and confirmation source such as guest link, staff, or auto same-day.
  • Waitlist cards show recent message history so staff can tell whether the guest was contacted.

What the labels and numbers mean

Awaiting guest confirmation

Hostbook has not recorded a confirmed response for this reservation.

What to do: Confirm manually if staff have spoken to the guest, or message/call according to house policy.

Confirmed by guest via SMS link

The guest used the confirmation link and Hostbook recorded it.

What to do: Treat this as stronger than an unconfirmed booking, but still update arrival and seating during service.

Auto-confirmed same-day booking

A same-day booking was automatically treated as confirmed.

What to do: Still verify at arrival; auto-confirmed does not mean the guest is physically present.

SMS delivery failed

Hostbook could not deliver the message.

What to do: Verify the phone number, retry if available, or contact the guest manually.

Walkthroughs

Message one reservation

Use one-guest messaging when the message is specific to that guest or booking.

  1. 1Open the reservation or click the message icon.Check that the guest, date, time, and phone number are correct before sending or queueing a message.
  2. 2Review the message purpose.A confirmation request, reminder, cancellation note, or custom service update should match what the restaurant intends to say.
  3. 3Send or queue according to setup.If messaging is not fully connected, Hostbook may record the attempt or queue state rather than send live SMS.
  4. 4Check the drawer afterward for delivery issues.A failed delivery warning means staff should verify the phone and may need to use Retry message or contact the guest outside Hostbook.

Send a bulk service message

Bulk messaging is for a group of reservations in the active service, such as weather update, delay, confirmation reminder, or service-wide note.

  1. 1Click the megaphone in the dashboard header.Bulk messaging uses the current service context, so check the date and service before opening it.
  2. 2Review who will receive it.Do not send a bulk message until you understand the target group. It may include pending guests for the selected service.
  3. 3Use clear guest-facing language.Mention the restaurant, date, time, and what the guest should do. Avoid internal shorthand.
  4. 4Send only when the message is truly shared.Use individual messages for special cases, allergies, VIPs, or anything that should not go to every selected guest.

Recover from failed SMS

Failed SMS is a service risk because staff may believe the guest was contacted when they were not.

  1. 1Open the reservation drawer.The failed delivery warning appears with context. If retry is available, the drawer can show a Retry message button.
  2. 2Verify the phone number.Check for missing digits, wrong country format, or a landline. Fix the guest phone if needed before retrying.
  3. 3Retry or contact manually.Use Retry message if it is available and appropriate. For urgent changes, call the guest or use the restaurant's manual communication process.

Good to know

  • -Messages should never replace good judgment for urgent guest communication.
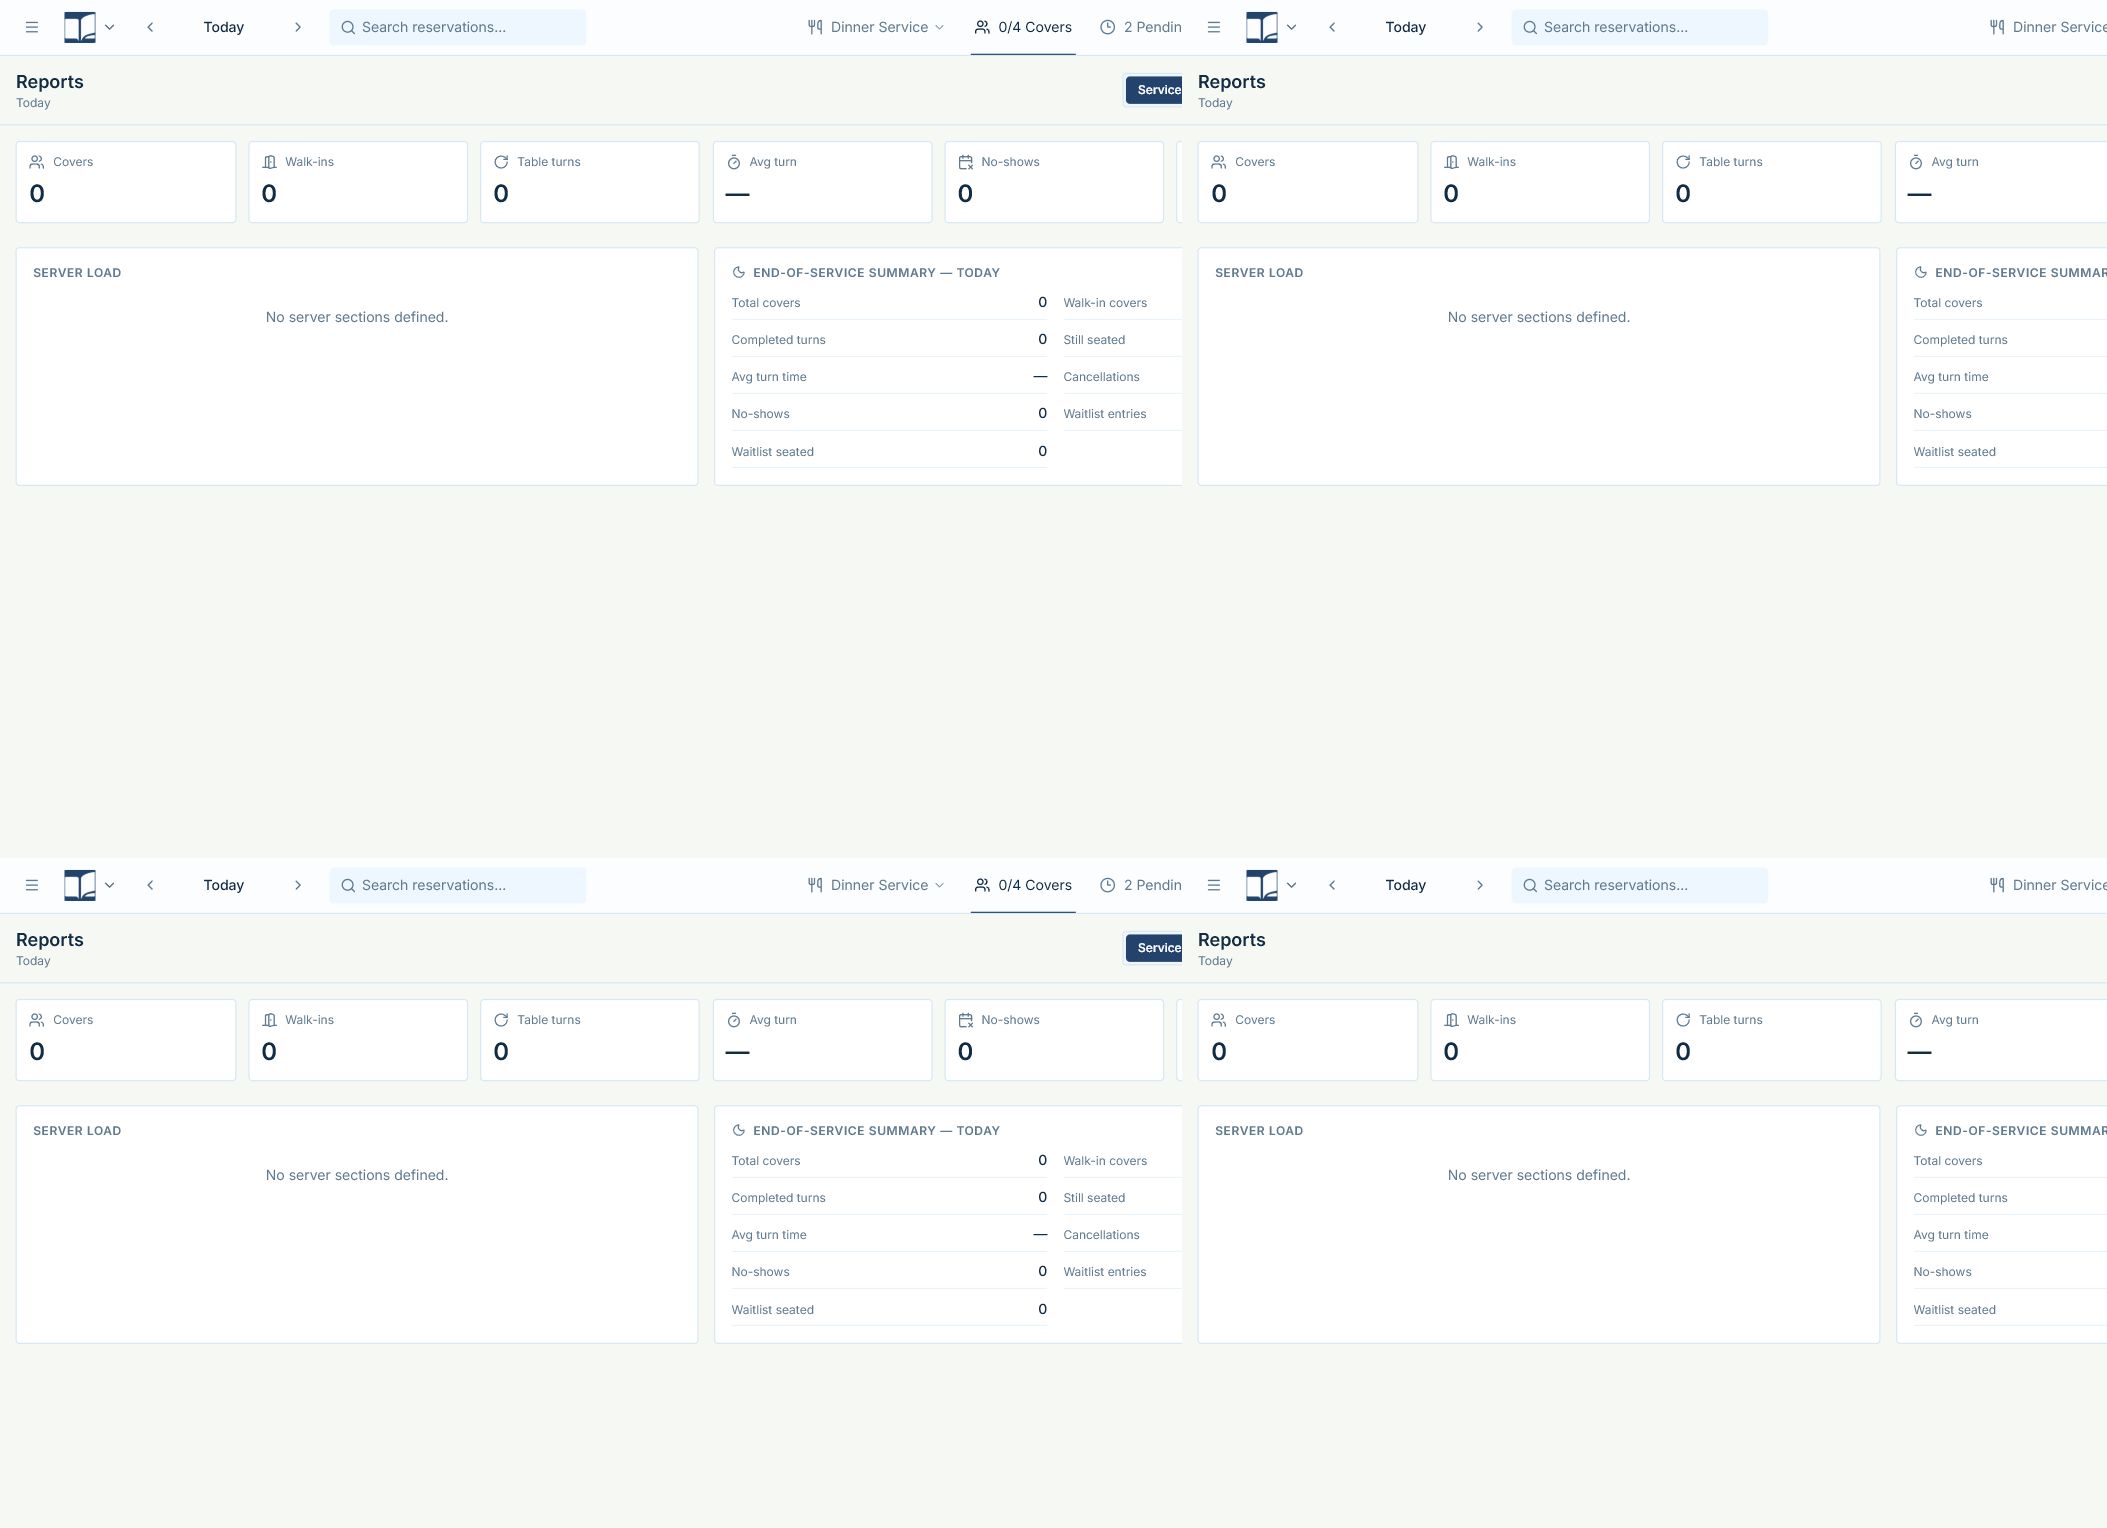
ReportsRead reports without guessingReports summarize service outcomes: covers, walk-ins, turns, average turn, no-shows, cancellations, day trends, server load, waitlist results, and closeout state.

What this means in service

Reports do not explain the business by themselves. They summarize the data Hostbook has. To read a report correctly, you need to know what each number includes and what it leaves out.

The most important rule: Covers in reports are seated plus completed party sizes. A booked reservation that never arrived is not counted as served covers.

Reports panel with range controls, stat cards, server load, and end-of-service summary
Reports are only as accurate as the statuses staff recorded during service.

How to read this screen

  • Use Service for the selected service date. Use 7 days, 30 days, or Custom when you want a trend or range total.
  • Read top stat cards first to understand the range. Then read Covers per day for trend, Server load for staffing balance, and End-of-service or Range totals for context.
  • If the report seems wrong, check reservations before blaming the report. Common causes are seated guests not completed, completed guests never marked seated, cancellations left active, or no-shows not recorded.

What the labels and numbers mean

Covers

Sum of party sizes for reservations with seated or completed status in the selected range.

What to do: If covers look too low, check whether staff forgot to mark arrived parties as seated.

Walk-ins

Seated or completed covers from reservations Hostbook recognizes as walk-ins.

What to do: Use this to understand how much of service came from non-reservation demand.

Table turns

Count of completed reservations in the selected range.

What to do: If turns look low after service, check whether seated tables were never marked completed.

Avg turn

Average minutes between seatedAt and completedAt for completed reservations that have both timestamps.

What to do: If it shows blank or dash, there may not be enough completed reservations with both timestamps.

No-shows

Count of reservations marked no-show.

What to do: A high number may point to confirmation, deposit, overbooking, or policy issues.

No-show covers lost

Party-size total for reservations marked no-show.

What to do: Use it to estimate lost seat demand, not actual served guests.

Cancellations

Count of reservations marked cancelled.

What to do: Compare cancellation count and cancellation covers against policy and weather/event context.

Covers per day

A bar chart of served covers by date. Hover detail includes covers, no-shows, and cancellations for that day.

What to do: Use it to compare service volume across days in a 7-day, 30-day, or custom range.

Server load

Covers and completed turns assigned to each active server section based on table-section assignments in the range.

What to do: Uneven bars suggest sections may need to be balanced before or during service.

Still seated

Reservations still marked seated in the end-of-service summary.

What to do: If service is over, review these before closeout because they make reports look unfinished.

Waitlist seated

Waitlist entries from that day that were seated.

What to do: Compare against waitlist entries to understand conversion and walk-away pressure.

Walkthroughs

Open the right reporting range

Choose the range based on the question you are answering. Do not compare a service-day report with a 30-day report as if they were the same scope.

  1. 1Choose Service for closeout.Service mode uses the dashboard service date and shows the end-of-service summary for that date.
  2. 2Choose 7 days or 30 days for trends.These ranges anchor to today and show range totals plus covers-per-day when there is more than one day.
  3. 3Choose Custom for a specific period.Pick start and end dates when reviewing a holiday week, promotion, event period, or owner-requested range.

Read service closeout

At the end of service, reports are a checklist for whether the day was actually closed in Hostbook.

  1. 1Start with Total covers and Walk-in covers.Total covers tells you seated plus completed party sizes. Walk-in covers tells you how much of that total came from walk-ins.
  2. 2Check Completed turns and Still seated.Completed turns should rise as tables leave. Still seated should be low or zero when service is fully closed.
  3. 3Review Avg turn time.This only uses completed reservations with seated and completed timestamps. If staff skipped status updates, average turn becomes less reliable.
  4. 4Review Cancellations and No-shows.These are not served covers. They show demand that did not turn into occupied seats.
  5. 5Review Waitlist entries and Waitlist seated.A high total with low seated count may mean quotes were too long, tables were unavailable, or staff did not close entries correctly.

Use server load to balance sections

Server load is useful during service and after service. It is based on table-section assignments, not a manager's memory of who felt busy.

  1. 1Compare covers and turns by server.Covers show guest volume. Turns show how many completed parties moved through the section. A server can have fewer tables but more covers if they handled larger parties.
  2. 2Look for uneven bars.A section with much higher covers or turns may need help, fewer future seats, or adjusted sections next service.
  3. 3Check section setup if data is missing.If the panel says no server sections are defined, reports cannot show server load until sections and assignments exist.

Investigate a number that looks wrong

Reports are downstream of reservation status. When a number seems wrong, inspect the underlying service before editing reports or assuming a bug.

  1. 1Check active reservations.Look for parties still marked arrived or seated when they should be completed.
  2. 2Check closed reservations.A party marked cancelled or no-show will not count as served covers. Make sure the closing status is correct.
  3. 3Check walk-ins.If walk-ins are low, staff may have created normal reservations instead of walk-in records or forgot to seat them properly.
  4. 4Check service date and range.A report on the wrong date or custom range can look like missing data even when the service was recorded correctly.

Good to know

  • -Reports are management tools, not guest-facing promises. Use them to spot patterns, then inspect the actual reservations before making operational decisions.
Settings and adminUse settings without disrupting serviceSettings control service periods, booking rules, floorplans, tables, sections, staff access, PINs, messaging, payments, branding, and online booking behavior.

What this means in service

Settings are powerful because they change how Hostbook behaves for the whole restaurant. A small setup change can affect staff views, online availability, reports, and guest booking links.

Make service-critical changes outside the rush when possible. If you must change something during service, tell the host team what changed.

How to read this screen

  • The header gear opens service settings that may require a manager or admin PIN.
  • Application Settings and Admin Settings in the sidebar expose broader setup areas. Some areas require admin access.
  • Service rules include name, start time, last seating, close time, slot interval, booking cutoff, service days, and party-size limits.
  • Floorplan setup controls rooms, tables, hidden/internal-only tables, alternate plans, schedules, and section assignments.

What the labels and numbers mean

Manager PIN

Approval for operational decisions such as service settings or certain overrides.

What to do: Use when the restaurant expects a manager-level decision but not full admin setup access.

Admin PIN

Approval for sensitive setup such as admin settings, users, policies, or restaurant-level configuration.

What to do: Limit to users who are allowed to change how the app behaves for everyone.

Booking cutoff

How close to service guests can book online.

What to do: Adjust when the restaurant needs more or less same-day booking flexibility.

Slot interval

The time spacing Hostbook uses for booking slots.

What to do: Changing it affects how times appear for staff and guests.

Walkthroughs

Change service and booking rules

Service rules define the shape of the day. Change them carefully because reservation forms, online booking slots, reports, and timeline views depend on them.

  1. 1Open Settings and enter the required PIN.If you do not have the right PIN, ask the manager or admin who owns the decision to approve it.
  2. 2Open Services and booking rules.Choose the service you need to edit, such as lunch, dinner, brunch, or a special service period.
  3. 3Edit only the fields you intend to change.Review service name, start time, last seating, close time, slot interval, booking cutoff, active days, and party-size limits.
  4. 4Save, then test the visible effect.Check the dashboard service switcher, Reservation Book slots, and online booking preview if the rule affects guests.

Manage tables and floorplan setup

Floorplan setup should match the real room closely enough that hosts can trust it while service is busy.

  1. 1Open the floorplan editor from settings.Use editor tools to add or change rooms, table numbers, table shapes, capacity, position, and hidden/internal-only behavior.
  2. 2Keep table numbers physical.Do not use creative numbers in the app if staff use different numbers in the room. The map should reduce confusion, not add translation.
  3. 3Use hidden or internal-only deliberately.Hidden removes a seat from the visible map for that layout. Internal-only can keep a table available to staff while limiting guest-facing online booking behavior.
  4. 4Review alternates and schedules.Alternate floorplans are whole-venue variants for events, patio season, holidays, and room changes. Existing assignments are preserved across matching physical tables. Capacity changes show conflicts; missing or hidden tables show the reservation as dislodged until staff or AI Host explicitly reassigns it.

Manage users and access

User access should match responsibility. Hosts need service tools. Managers need operational approvals. Admins can change restaurant setup.

  1. 1Open Admin Settings with admin approval.Use admin access for staff setup, restaurant-level configuration, and policy changes.
  2. 2Assign the lowest useful role.Do not give admin access to someone who only needs to seat guests or send service messages.
  3. 3Review access after staff changes.When staff leave or change roles, update access so old permissions do not remain active.

Good to know

  • -If a setting affects online guests, test the guest booking page after saving.
  • -If a setting affects staff workflow, tell the team before service starts.
Online bookingUnderstand the guest booking pageOnline booking lets guests choose party size, date, time, and contact details from the public booking link or embedded booking page.

What this means in service

The online booking page is the guest-facing side of Hostbook. Guests do not see internal staff notes, manager settings, or the operational reasons behind availability.

Availability shown online depends on service rules, party-size limits, booking cutoff, table capacity, hidden/internal-only settings, blocked or held tables, existing reservations, and any open-event rules.

How to read this screen

  • The guest starts with party size and date, then chooses from available times.
  • If no times appear, the issue may be service schedule, cutoff, party-size limit, capacity, existing bookings, table setup, or online booking being disabled.
  • The final form collects guest name and contact details. After submission, the reservation appears in Hostbook for staff to manage.
  • Embed links can show booking inside another site. Public links open the booking page directly.

What the labels and numbers mean

Booking link

The public URL guests use to book with the venue.

What to do: Copy it from Admin Settings and test it after setup changes.

Embed link

A URL intended to be embedded in a restaurant website.

What to do: Use when the restaurant wants booking inside an existing site page.

Cutoff

How soon before a time slot online booking closes.

What to do: If guests cannot book same-day, check cutoff before assuming availability is broken.

Party-size limit

The smallest and largest party sizes guests can request online for a service.

What to do: If large parties cannot book, check service party limits and deposit policy.

Walkthroughs

Test the guest booking flow

Test online booking like a guest after changing service rules, table setup, public links, or policy settings.

  1. 1Copy the public booking link.Find it in Admin Settings. Use the public link for normal guest testing and the embed link only when testing an embedded website flow.
  2. 2Choose party size and date.Pick values that should be available based on your service rules. If you choose a closed date or party size outside the limit, no times may appear.
  3. 3Choose an available time.The times reflect current rules and capacity. If a time you expect is missing, check service window, cutoff, table capacity, and existing reservations.
  4. 4Enter guest details and submit only if you want a real test booking.A submitted public booking creates a real reservation. Delete or cancel it afterward if it was only a test.

Troubleshoot missing online availability

No availability usually means Hostbook is protecting a rule or capacity constraint. Work through the causes in order.

  1. 1Check online booking is enabled.If guest booking is disabled, the public page may not offer normal booking slots.
  2. 2Check the service schedule.Make sure the service runs on that date and weekday and has a valid booking start and last seating time.
  3. 3Check party-size limits.A party outside the service minimum or maximum will not get the same availability as a normal party size.
  4. 4Check capacity and holds.Existing reservations, blocked tables, held tables, hidden tables, and internal-only tables can all reduce guest-facing availability.
  5. 5Check booking cutoff.A time may be available operationally but too close for online guests to book.

Good to know

  • -Never assume guests understand internal capacity rules. If online booking is intentionally limited, guest-facing copy should be clear.
Offline, PINs, and safetyStay safe when connection, permissions, or warnings appearOffline state, sync warnings, PIN dialogs, closed service periods, and conflict warnings are safety systems. They prevent staff from making changes that may not save or may harm service.

What this means in service

When Hostbook warns you, pause. Repeating the same action quickly can make a busy service harder to untangle. Read the warning, confirm the context, then take the smallest accurate action.

Offline or syncing states are especially important. A change that looks local may not have reached the shared service book yet.

How to read this screen

  • Offline means the device cannot currently trust live network updates. Keep the page open and avoid non-urgent changes until the connection returns.
  • PIN dialogs mean the app needs a manager or admin to approve the action. The PIN is part of accountability.
  • Closed service periods can make actions unavailable. Review-only mode protects past or closed services from accidental changes.
  • Conflict warnings identify a specific reason an assignment may not work. Read the reason before overriding.

What the labels and numbers mean

Offline

The device is not reliably connected to the shared data service.

What to do: Stop non-urgent changes, reconnect, keep the page open, and verify important reservations after sync returns.

Syncing

Hostbook is working through pending updates.

What to do: Wait for live or synced state before repeating actions that affect guests.

Manager override

A protected action is allowed only when a manager accepts responsibility.

What to do: Use for real operational decisions, not to skip reading a warning.

Service closed

The selected service period is not open for active seating changes.

What to do: Change date/service if you are on the wrong period, or review without editing if the period is intentionally closed.

Walkthroughs

Respond to Offline or Syncing

The goal is to prevent split-brain service where one device thinks a change happened and another device does not.

  1. 1Stop non-urgent changes.Do not keep seating, cancelling, or moving guests if the app is telling you it cannot sync reliably.
  2. 2Keep the page open.Closing the page can interrupt pending local actions before they finish syncing.
  3. 3Reconnect the device.Check Wi-Fi, network, and device connectivity. If another device is online, use it for urgent changes.
  4. 4Verify important records after sync.Open recent reservations and tables to confirm the changes that matter most: seats, moves, cancellations, and notes.

Use PIN prompts correctly

A PIN prompt means the app is asking for authority, not just identity.

  1. 1Read what action is being approved.Make sure the manager knows whether they are approving a setting change, fee action, override, or admin access.
  2. 2Enter the approving user's PIN.Do not share PINs. The approval should point to the person who made the decision.
  3. 3Complete only the approved action.After approval, avoid making extra unrelated changes under the same context unless they were also approved.

Handle warnings and disabled actions

A disabled button or warning usually tells you what condition is blocking the action. The fix is rarely clicking harder.

  1. 1Read the disabled reason or warning text.Service closed, past date, locked table, blocked table, offline availability, and conflict checks each require a different fix.
  2. 2Check date and service first.If you are on a past date or closed service, live actions may be intentionally unavailable.
  3. 3Check lock, hold, and block state.Unlock, release hold, or release block only if the real-world reason for that protection no longer applies.
  4. 4Ask for manager help when the decision changes capacity or policy.Overrides, fee decisions, and service setup changes should be manager-level choices.

Good to know

  • -When in doubt during service, write down the physical reality first: guest, table, time, and what happened. Then update Hostbook once the safe path is clear.

Troubleshooting

Pause, check, then fix the right thing

Most service problems are not solved by repeating the action. Check the date, service, connection, permission, and status first.

A reservation is missing.

Check the date, service period, search filters, guest spelling, phone number, and confirmation number. If the guest booked online, also check whether the booking was created for a different date or service.

A report number looks wrong.

Inspect statuses first. Covers count seated and completed party sizes. Turns count completed reservations. No-shows and cancellations do not count as served covers.

A table cannot be selected.

Check whether the table is seated, held, blocked, hidden on the active floorplan, too small, locked by a reservation, or unavailable because the service is closed.

Online guests cannot find a time.

Check online booking is enabled, service schedule, booking cutoff, party-size limits, table capacity, existing reservations, held or blocked tables, and hidden/internal-only table settings.

A message failed.

Open the reservation drawer, verify the phone number, use Retry message if available, and contact the guest manually for urgent changes.

The app says Offline or Syncing.

Pause non-urgent changes, keep the page open, restore the connection, and verify important seats, moves, cancellations, and notes after sync returns.

Plain-language glossary

Words you will see in Hostbook

Cover
One seated guest. A party of four is four covers. Reports count served covers from seated and completed reservations.
Turn
A completed use of a table by one party. In reports, table turns are completed reservations.
Service period
A configured seating window such as lunch, dinner, brunch, or a special event service.
Pending
An active reservation that is not closed out as completed, cancelled, or no-show.
Linked tables
Two or more physical tables used together for one reservation or walk-in.
Held
A table saved from normal seating for a service, end of day, custom time, or until manually released.
Blocked
A table removed from use until someone releases the block.
Internal-only
A table available to staff but restricted from guest-facing online availability.
No-show covers lost
Party-size total from reservations marked no-show. It estimates lost demand, not served guests.
Average turn
Average minutes between seated and completed for completed reservations that have both timestamps.